Mastering Mail.app: A Beginner's Guide
Eric Buczynski May 11, 2007 Tutorials Mac Apps Email
If you use Apple’s Mail application, you may be looking at the menu options and wondering what they’re good for. Most of us just use email to keep in touch with friends, family, and coworkers, right? Well, we’re going to show you what other features are available to make mailing easier and more convenient. We’ll cover the options in Mail’s preferences and show you what’s possible.

We’ll assume that you already have your email account set up in Mail. If you don’t, Mail provides step-by-step instructions on how to set it up. It only involves grabbing the incoming and outgoing mail server information regarding your email provider, and then a few more clicks of the mouse to get everything synchronized.
Email Basics
Almost everyone already knows how to send and receive email. However, here are a few tidbits to be aware of - they could make things interesting!
- In the View menu, you’ll find that you can add multiple columns to provide more details for each email. This is probably no big deal for those who have been using Mail for some time, but by adding a size column, you can see the size of each email message.
- Be mindful of the size of the email messages you compose. Long email messages and those with attachments are obviously bigger, but emails created in plain-text format are significantly slimmer in size compared to email messages created in Rich Text format. Email messages with graphic signatures can also make for larger sizes. Remember that not everyone has an email account on a server with unlimited size, and that significantly large email message may impact a person’s mailbox bandwidth and box size.
- You can add a BCC (Blind Carbon Copy) field to your email messages in case you want to send emails to others without revealing the names of recipients. In addition, you can add a “Reply to:” field in case you want the recipient to email you back at a different address. This is handy for emailing someone while at work using your work email account. The “Reply to:” is just that, a field. So if the recipient doesn’t look at and follow the “Reply to:” field, then his or her reply will return back to the email account that the original email came from and not the account the sender wants. Both of these options are available from the View menu.
The submenus lurking in the Message menu are helpful in detecting scam email messages. Here’s a section of a recent email that I’ve received from a friend:
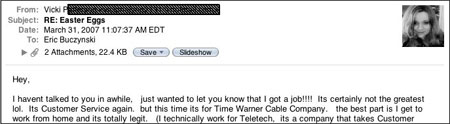
Obviously, we know this is our friend, because we recognize the name and email address, as well as the icon that we have set up for her in Address Book. (See our article on Apple’s Address Book.) On the other hand, if our “friend” wrote, “I want your rock-hard body and I want it tonight!” then we’d know the person writing this was a fake, and we’d have to investigate it further. This is accomplished by going to the View menu, then selecting Message, then Long Headers. The result is shown below:
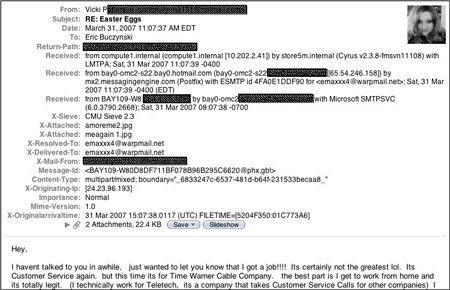
Now we have more information regarding the destination of the email. If we wanted it broken down a bit further - to where the email message body doesn’t show any Rich Text or graphics - we would go to the Message menu and select “Raw Source” which yields this:
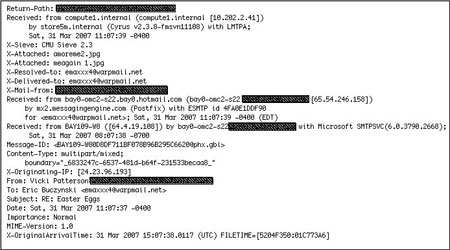
This is just a sample of the email message, but the other information is looks basically the same.
If you ever get emails from what may seem like PayPal or eBay, there are two ways to check for validity. The slower, but more natural way, is to simply log in to your PayPal or eBay account and check for messages and possible unauthorized activity. We’re still in the habit of doing this ourselves. The faster way is to simply view the email with the long headers and trace the websites and servers of the originating site. If there are any links in the email message, you can right click on the link and copy it, then paste it into a blank browser window. Every time we’ve done this with an email message that we suspected to be phishing or scam email, the copied link was different than what appeared in the email message.
Delving into Mail’s Preferences
Apple’s Mail is a pretty large application, so you’ll want to customize it and tailor it to your specific needs.
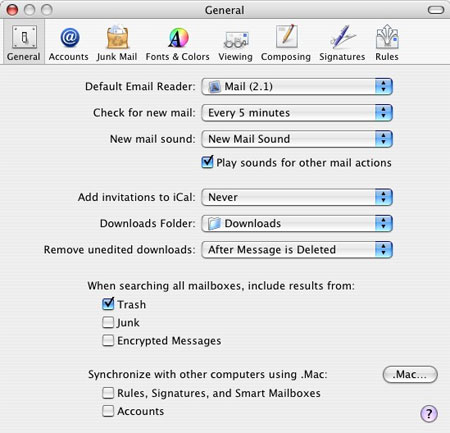
To get started, select Preferences from the Mail menu. Let’s cover the General section first. You can set your default email reader to be Mail, although if you have a POP account from a provider like Yahoo, you’ll still have to use your browser to check your mail unless your email provider can forward it for free (for Yahoo!, try YPOPs!). The user can also choose the interval in which emails are checked, in addition, of course, to checking email manually. New emails can be indicated by whatever sound the user chooses. One can grab a copy of any audio file, chop off unneeded parts, convert it into an .aiff file, and add it as a mail notification sound. Regarding the Downloads Folder, we have a separate downloads folder to keep track of attachments we receive via email and files downloaded from the internet, so that’s where we have those files going. The download destination can be changed for individual messages by choosing the attachments as a group or individually and selecting what file you’d like them copied to.
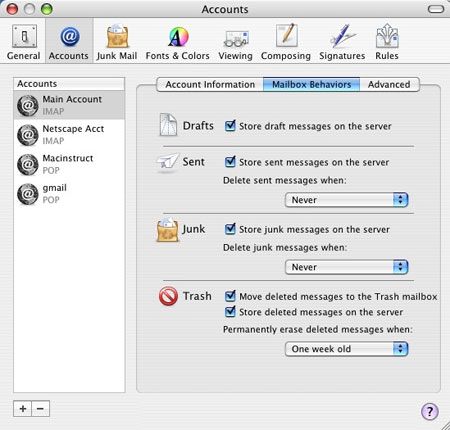
Under the Accounts section, you have access to your server settings. Unless you’re having trouble sending and receiving mail from your accounts, it’s best to leave the information under the “Account Information” tab alone. However, there is one thing to be aware of. Under the Rules tab, there’s a condition where the email may or may not be addressed to the user’s full name. So, if we have our full name in the Account Information tab listed as “Eric Matthew Buczynski,” but have a condition set where email not addressed to our full name is deleted or sent to the trash; normal, non-spam emails that have our name listed as Eric Buczynski may get trashed for no good reason. Because of this, it might be best to leave out your middle name or any formal titles, but it’s at your discretion. Mailbox behaviors vary between POP and IMAP types but function generally the same way. The same applies for the Advanced tab under Accounts. You can enable and disable each account as well as include these accounts for checking new mail.
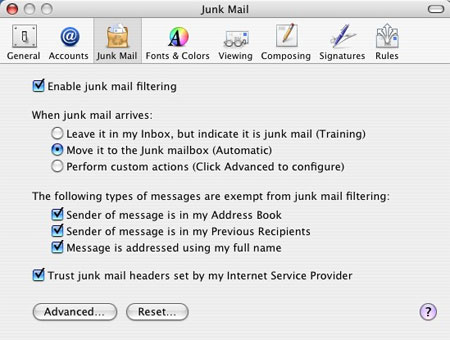
One thing you don’t want to simply glance over is the Junk Mail section. Unless you like wasting time searching line after line for actual emails, we recommend leaving the “Enable junk mail filtering” button checked. Even as you’re going through individual emails that show up as junk, you can simply click the “not junk” button to label those special emails. Check out the options under “When junk mail arrives:” If you get an email from a known person that meet certain criteria that might categorize it as junk mail, it’s better to leave it in the junk mailbox just in case. This is a matter of preference of course, so choose the option that works best for you. We leave all three options for junk mail exceptions checked as well, knowing that the people we communicate with regularly won’t send us any junk emails. Clicking the “Advanced…” tab brings up a rule not editable in the Rules tab, and this sets the strict parameters for junk email filtering. Because we get ads for Viagra and other drugs, we’ve added an extra parameter in the junk rule stating that if an email has an attachment ending in .gif (because most people on my email list send .jpeg photos) it automatically gets sent to the junk mailbox. Clicking the “Reset…” button changes the parameters and condition in the junk mail database back to their default values, but this is not completed unless you press “Yes” in the “are you sure?” type dialog box. For information on filtering spam, see How to Stop Spam.
The Fonts & Colors preferences let you choose what typeface and colors Mail uses. This alters the appearance of the font in the sidebar showing the mailboxes, the font of the list of emails, and the text in the email bodies themselves. If you’re quoting text such as that in a forum, you can select what colors the quoted text looks like. Aside from choosing a list of what popular colors they offer, select “Other…” at the bottom of the list.
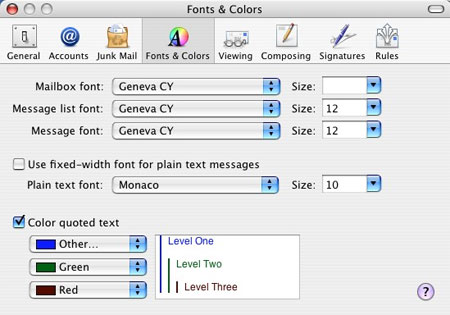
Ah, the famous color picker. If you’ve ever had a computer and complained about not having enough choices, surely this will answer your complaints. Using the small tab bar at the top you can choose between the all-to-common color circle and brightness adjuster, print and web sliders, grouped color swatches with drop-down list choices, a spectrum palette, and the crayon box. If you’ve never chosen favorite colors and made your own swatch palette, simply click the color next to the magnifying glass without letting go of the mouse button and drag it to one of the white (or blank) squares at the very bottom. Thankfully Apple gives you 15 color swatches to choose from. Err, we mean more than 15. See the tiny circle at the bottom of the window? Drag it down further and you’ll be given a total of 150 empty boxes to set for your own color choices! This color choice can also be found at the top bar when you’re creating a new email, unless you have the bar customized and set so no color choice is present.

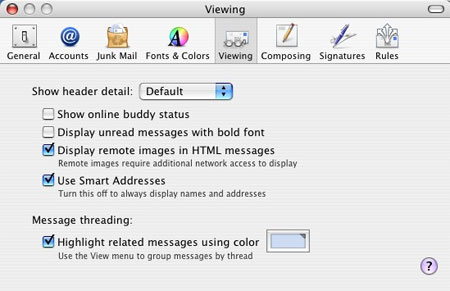
In the Viewing preferences, we have Show header detail set to Default, but Mail gives you the options of displaying all headers, no headers at all, or setting up a custom list. Headers is the gibberish text that shows up before the body of an email displaying where it came from, where it went, and other data. This is especially helpful if you get an email from eBay or PayPal and you’re not sure if it’s legitimate or bogus. Viewing the header information will give you fine details as to where the email came from, but beware that some scammers might have put in an email address such as admin@PayPal.com where the “L” is an uppercase letter “i”. This is why we’ll see a link to login to PayPal, but instead of clicking on the link, we’ll simply copy the link by right-clicking on it, then paste it into our web browser. It’s a better practice to simply log in to your eBay, PayPal, or banking accounts directly to check for messages and unauthorized activity, but we like seeing what websites and emails these scammers use.
Along with the header detail, you can also view a sender’s online activity. So if you’re going to reply to someone on your buddy list, and suddenly you see them online, you can notify them by email if you’d like. Right now, this seems to only work when iChat is running, as I have tried this using Adium, a third-party chat program, with no online access indicators showing up in my email. Checking the option to display any remote images means that if we have a link to a graphic on another page, the person viewing the email has to be connected to the Internet to view it. This may not be a big deal to some of us with high-speed access, but it can be inconvenient for those who do not. A better alternative would be to get the graphic (or whatever file type that is being linked) and save it to your hard drive, then attach the file in the email itself.
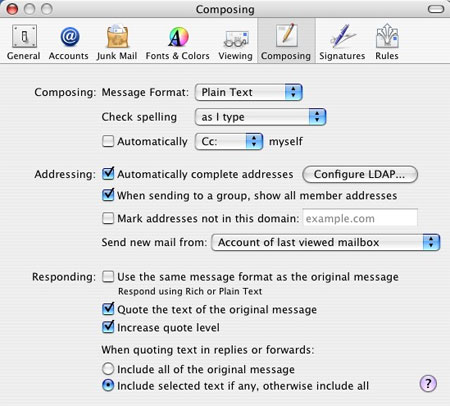
You’ll find a bunch of options in the Composing preferences. The message format does have an impact on message size when sent. Plain text allows for smaller email sizes, but Rich Text allows for text formatting so that you can add bold, underlined, and italicized words. Spell checking can be disabled or enabled, plus you can have it set so that it checks as you type or checks it right before you click the send button. You can also send yourself a carbon copy (where the recipient notices that you sent yourself a copy) or a blind carbon copy (where the recipient doesn’t know you’ve sent yourself a copy).
You have the option to automatically complete addresses. This is a great time saver, but you have to be careful when using it. When you start typing a few letters of the recipient; simply press Return, Tab or the space bar to have Mail complete the recipient’s address. Pressing the right arrow key will have Mail fill in the rest of the addressee’s information, but also allow you to overwrite the highlighted text or continue to manually add email recipients.
You can choose which email account you’d like new mail to come from. This is helpful if you notice email being sent from one address takes a longer amount of time and you’d rather choose a slightly faster email server. Of course, anytime you write or reply to emails, you can always choose the email account that the message will show that it’s coming from. When you’re replying to an email, Mail gives you the option to include all of the original message or highlighted text from the message. You can highlight text from the message, hit “Reply”, “Reply to All” or “Forward” and the highlighted text will be the only part of the original message in the email that’s being replied to or forwarded on.
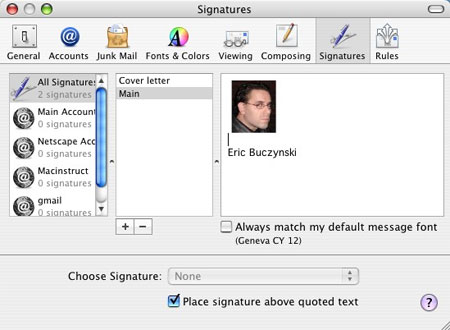
Ever go to a forum and see the nifty quotes or graphics left behind by posters? Those are called signatures. You can simply type in text with your name so that you don’t have to manually type in your name at the end of every email.
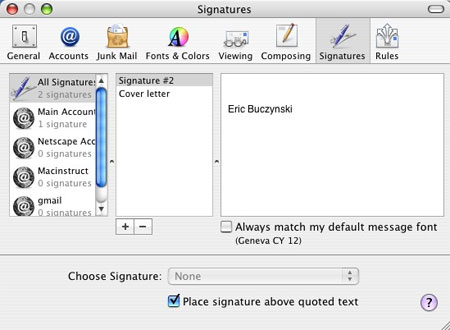
What some do is write their name in handwriting multiple times, choose the best one, then use a scanner to get it into their Mac. From there, it’s saved as a graphic file and placed as a signature so that the ends of their email appear to have been signed personally. If you’d like, you can also add a picture to the end of your emails.
Rules allow you to designate what mail goes where. You can set up as many rules as you want. Any rules you set will be applied to all the email accounts you have active, but each rule can be set to affect one or more accounts that you choose. When you click the Edit button, you can set each rule to affect any or all conditions that you choose. To eliminate some of the common spam emails, I’ve added conditions that are common to most of those emails to keep them out of my normal mailbox. The conditions don’t follow any particular order, but you can add and subtract conditions at will. How about we take a look at those conditions?
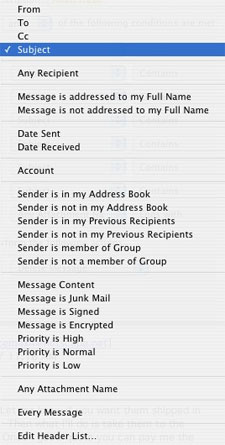
This list of conditions is very extensive and allows for total control. Mail isn’t the smartest program, and it can’t read minds. Experiment with the settings until you understand how they work. The final output can be set so that the email is flagged, has a different color in the list of emails, or moved to a separate folder. What’s great about rules is that you can also organize and track legitimate emails - moving or copying them into separate folders if you’d like. Even if you get various junk email for different products and services, you can segregate them into differentiating junk mail folders by type or importance.
Brainwashing Mail: Lose Your Old, Out-of-date Contacts
Anytime you start a new email and begin to type in the name of the recipient, Mail assumes you’re going to send it to a previous recipient. But how many times have you typed a letter or two only to see a long list of people you haven’t talk to in months? The way to slim down this long list of email addresses is to use the Previous Recipients window. That window is found under the Window menu.
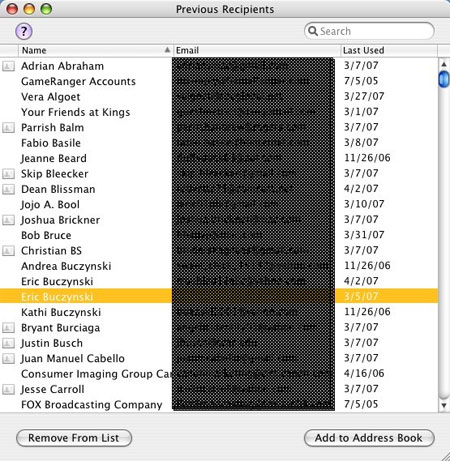
Here you see a list of previous recipients. The list is arranged alphabetically by name by default but can also be arranged alphabetically by email address. What we find to be more efficient is having the list arranged by the last time used. Cleaning out this laundry list will not only speed up new email processes but may even help you keep in touch with long lost buddies.
Ready to do More With Mail?
Take a gander at a little blog called Hawk Wings. This helpful website is dedicated to Apple’s Mail, and it has all sorts of tips and tricks to help you do more. Check out their incredible list of plug-ins for Mail. Pretty amazing!
Subscribe to our email newsletter
Sign up and get Macinstruct's tutorials delivered to your inbox. No spam, promise!