How to Transfer LP Records to Your Mac
Matt Cone May 16, 2007 Tutorials Mac Music
We didn’t live through the heyday of vinyl, but we do own a few LPs. The recording industry is currently trying to figure out if we have the right to “own” digital copies of our records. While they work on that, we’re going to quietly show you how to digitize old LPs and cassette tapes. Just don’t put the resulting files on a peer-to-peer network!
Connect Your Turntable to Your Mac
First, you need to connect your turntable to your Mac. Most Macs have an audio input jack, like the one on our eMac:

Not the most intuitive symbol for audio input.
Not all Macs have audio input jacks. If your Mac doesn’t have one, look into a third-party solution like Griffin’s iMic.
Of course, you’ll need a cable to connect the record player to your Mac. It’s not advisable to connect a record player directly to your Mac - you know, for the lower sound quality reasons. You can use the headphone jack on a receiver with a phono port, or you can use another suitable pre-amp. A headphone jack and a long enough cord like this will do the trick with a receiver or a tape deck.

After you plug everything in, you’re ready to rock and roll!
Configure Your System Preferences
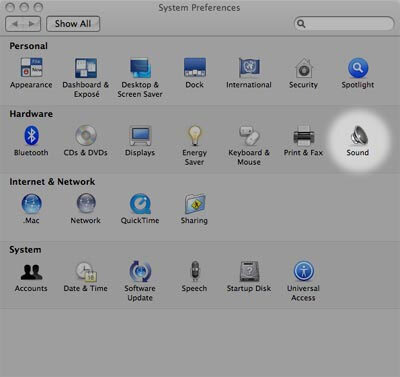
Now that your Mac can hear the recording, we need to make it listen. From the Apple menu, select System Preferences, and then select Sound.
If you have an iMac, eMac or Apple portable, set the input to Microphone and run your finger over your Mac’s built-in mic. (The mic looks like a little hole in your case.) This will make the input level indicator go crazy.
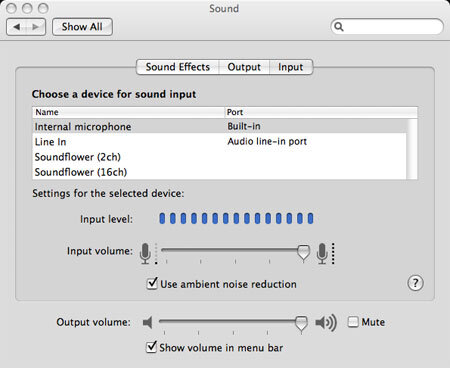
Note that the blue Input Level bar is at maximum.
When we begin recording, a “crazy” Input Level bar will be a very bad thing. Set the sensitivity of your audio input by adjusting the Input Volume slider - set it right in the middle.
Finally, select Line In as the device for sound input. Close the System Preferences.


Your Mac is now ready to listen to your record player!
Getting started with Audacity and LAME
Your Mac is ready to listen, but now we need to make it understand. We’ll use Audacity, a wonderful free and open source digital audio editor. It’s like Quicktime Pro for audio, but on steroids. There are a few Mac applications dedicated to ripping analog audio, but Audacity is free, and we like open source software.
Audacity is available at Sourceforge.net along with a bunch of other open source projects. Go ahead and download it. And, as long as we’re shooting through the Internets, we should pick up a copy of the LAME codec from SpaghettiCode.org. We’ll use this to compress our songs into the highly compatible MP3 format.
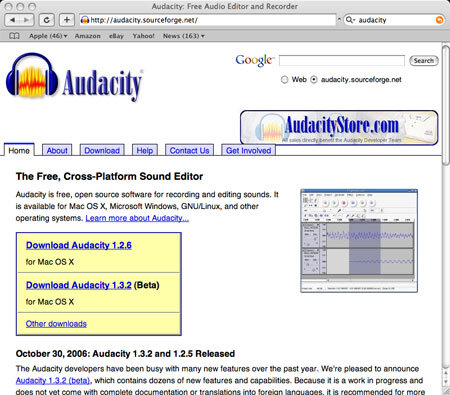
Once you’ve clicked the appropriate “Download” hyperlinks, you should have an Audacity folder somewhere on your hard disk. If you’re using Safari, the easiest way to find it is to click to the magnifying glass in your download window.

Audacity and LAME should be in the same place. Copy LAME into the Audacity folder, and send the whole thing to the Applications folder. (That is, unless you like having programs all over the place.)
With the record player connected to your Mac, launch Audacity.
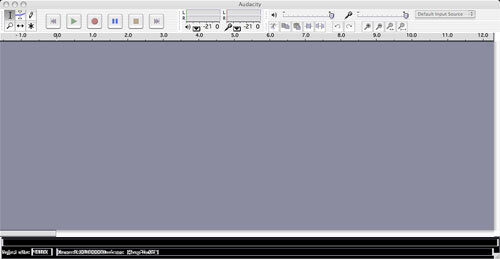
Like most powerful programs, Audacity can be daunting to a beginner. But since we’re just using it to make a recording, the learning curve is tolerable and there’s relatively little set-up.
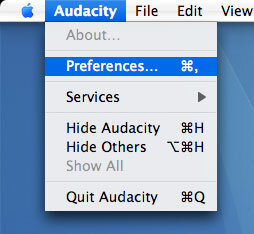
Let’s configure Audacity’s preferences. From the Audacity menu, select Preferences.
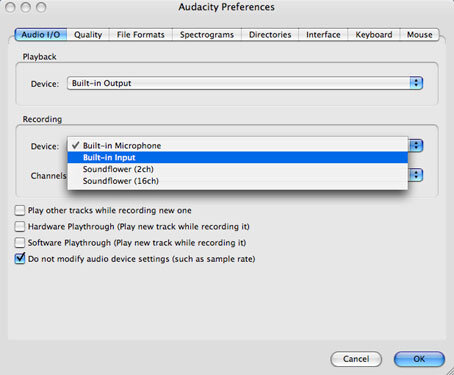
Select the Audio I/O tab. Make sure that your line-in is the recording source by selecting Built-In Input from the Device menu.
Select the File Formats tab. You should use AIFF (Apple/SGI 32 bit float) for uncompressed audio and, while we’re here, we can make use of the LAME library we downloaded earlier.
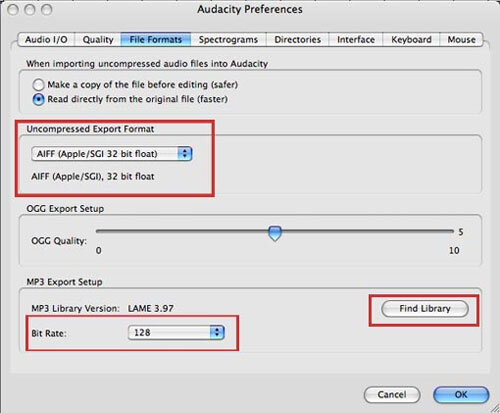
Click Find Library and point Audacity to the LAME library, which should be in your Audacity folder if you closely followed our instructions.


With that completed, Audacity can compress audio into the MP3 format. It might be a good idea to bump up the default MP3 bit rate if you’re an audiophile or if you have room for higher quality music.
Preparation and the Recording Process
To get a quality recording, you’ll need to prevent clipping the sound waves. “Clipping” literally means removing parts of the sound wave because of improper loudness from the source material.

Note that the peaks of the waves are flattened abruptly, or “clipped.”
To prevent this problem, let’s run some test audio through Audacity. Play a recording or radio station through your receiver or tape deck. We wouldn’t recommend using a vinyl record for this, since it will require resetting the needle. With the source playing, switch over to Audacity and click the record button.

The record button looks like a standard record button on a VCR or tape deck.
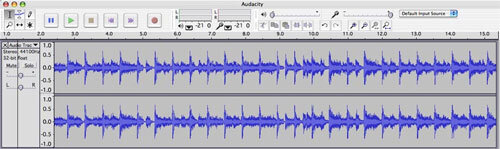
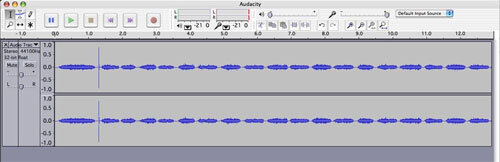
Blue lines will show up in two rectangles. The rectangles are called the tracks - you’ll have left and right audio for a stereo signal. The lines represent the loudness of the source. You want a nice clean wave with the highest highs and lowest lows near, but not outside, the track.
If you’re getting some clipping, adjust the volume on the source.
On the opposite side of the spectrum, you could have a very small wave that will make a very quiet digital sound file.
If this is the case, carefully turn up the volume or increase the sensitivity of the line-in. Clipping is much worse than low signal input, but do try to get a strong signal for the sake of your effort and audio.


Once you’re reasonably happy with the sound levels you’re getting, it’s time for the real thing. Stop the audio and close any and all test tracks, just like you would a window.
- With no audio signal being transmitted to your Mac, hit the record button in Audacity to create a lead-in. As quickly as you wish and can, start playing your record.
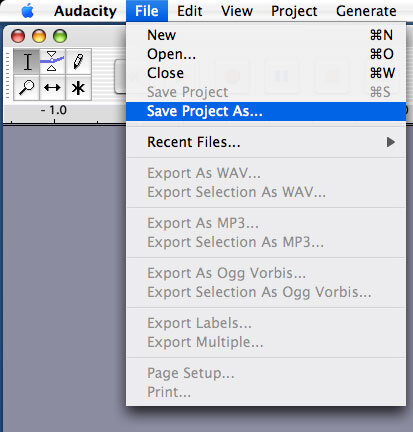
Sit back and let the record play through. When the first side ends, click Stop in Audacity. Now for a little insurance. Save your progress by selecting Save Project As… in the File menu, just like you would save a file in any other program. You’ll get a warning, but just click OK.
This will create a .aup file and a data folder (in the format: Example_data) in the same directory. The .aup file will let you edit your recording later, and the data folder holds (surprise!) all the audio data.

Defining and Exporting Tracks
Now that we have our audio, we need to be able to see it in its entirety. Audacity has a zoom tool in its toolbar, just like an image viewer (i.e., Preview). Zoom out until you can see your whole wave.

The selection tool in the upper left-hand of the tool bar; the zoom in the lower right.
The default tool that Audacity gives you is the selection tool, which looks an awful lot like the text selection cursor from a word processing program. Obviously, a pause between tracks has no sound and will be represented in the wave form by a flat line. Use the selection tool like you’re selecting a line of text and highlight your first song. It’s nice to know how long each song is, just in case there’s a “quiet moment” in a song. (Don’t be fooled!)
After highlighting a song, select Add Label at Selection from the Project menu. A label track appears under the stereo tracks. You can enter the name of the song, or any other text that will help keep you organized, in the label track.
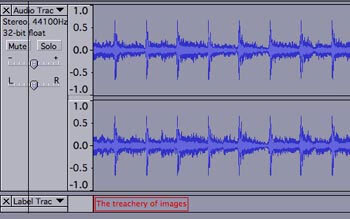
Ceci n’est pas un son. (Art humor.)
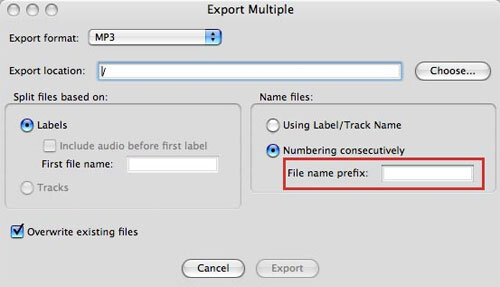
Define and label all the tracks, and then select Export Multiple from the File menu. Choose either uncompressed aiff format or teensy mp3. Or even the open source Oog Vorbis format if you like. (But it won’t play on your iPod.) Numbering consecutively will help keep your tracks in order. Just add a convenient File name prefix such as the album title.
Open your new audio files with iTunes, edit the ID3 tags if you like, and burn like any other audio CD.


Whew! You’re Finished
These files will not be of the same quality as a ripped CD, or a file from the iTunes Store. Most analog audio signals have minor imperfections, such as normalization issues and pops, clicks and scratches in the case of a vinyl LP. Audacity can fix these issues, but it’s more of an art than a science. Audacity has a variety of filters that can be used to fix these imperfections, but these are advanced techniques. We’ve spent enough time on the basics alone! There are other programs that can remove sonic “dirt.” And iTunes has a normalize feature. But who can resist the warmth of vinyl converted to a digital audio file?