How to Clone and Backup Your Hard Drive
Stephen Korecky June 7, 2007 Tutorials Mac Backups
When you need to clone your drive, or simply do a full backup, someone usually tells you to use Carbon Copy Cloner (Donation Recommended) or SuperDuper! ($27.95). Sure, both of these applications are great programs, but they aren’t necessary. You can use Apple’s own software that comes free with your Mac!
We’re talking about Disk Utility ( User > Applications > Utilities > Disk Utility.app ) It’s free, easy-to-use, and it does the job right. Here’s how to use Disk Utility to clone and backup your hard drive:
Start up from the Mac OS X disk that came with your Mac. To do this, insert the CD or DVD into your Mac, and hold down the C key while your Mac restarts.
Go ahead select your language. Don’t worry: You’re not installing Mac OS X again - this is just what you have to do to get to Disk Utility. When the menu bar appears, select Disk Utility from the Utilities menu.
When Disk Utility opens, you’ll want to select your source. This is the hard drive you want to clone and/or backup. After you have a source, select the Destination. This is the hard drive you want to save the backup image to.
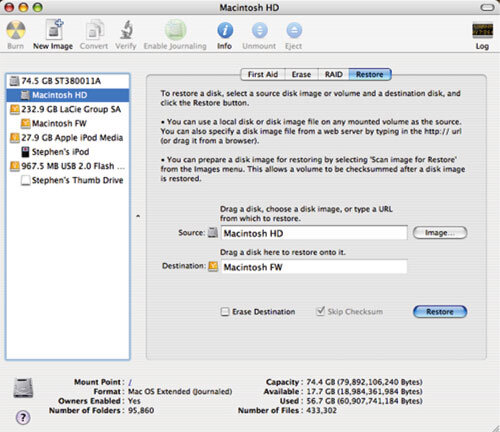
Click Restore and you’ll end up with a perfect copy of your hard drive. Restart your computer and you’re good to go!
