How to Configure Network Locations in OS X
Matt Cone March 14, 2013 Tutorials Mac Network
Your Mac allows you to save and quickly switch between multiple network configurations, which are referred to as network locations in OS X. This is a useful feature for users who need to set network-specific proxies, DNS servers, or static IP addresses. You can also use network locations to specify settings for specific network interfaces, such as an Ethernet card, Wi-Fi or Bluetooth connection, and even VPN.

Once you’ve created and saved different network locations, you can switch between them by using the Apple menu or System Preferences. When you move between your home and office, or the coffee shop and the airport, you can change your network location to activate different network settings.
Understanding the Automatic Network Location
Of course, you don’t need to configure any network locations to connect your Mac to the internet. By default, OS X has an “Automatic” network location which connects your computer to any available networks and interfaces automatically. This setting is all most users will ever need. Only professional users with specific network settings that differ from one network to another will need to create other network locations.
Adding a New Network Location in OS X
Ready to start adding and configuring network locations on your Mac? Here’s how:
From the Apple menu, select System Preferences.
Select Network. The window shown below appears.
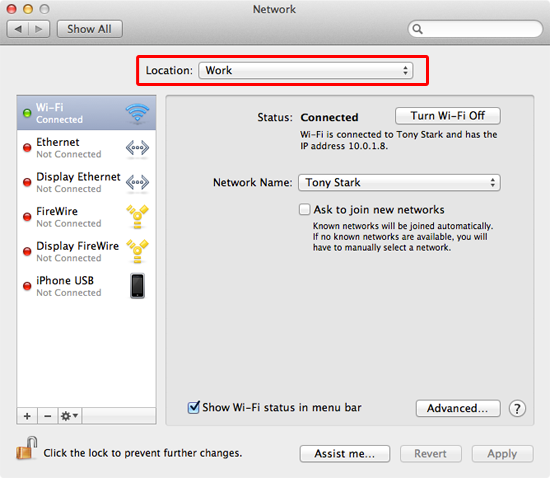
From the Location menu, select Edit Locations. The window shown below appears.

Click the + button to add a new network location.
Type a name for the network location, and then press Return.
Click Done. The new network location is saved and made active.
Now configure your network settings for this location in the Network preferences. Any changes you make will apply to the new network location and not your other network locations.


Congratulations! You have successfully created a new network location on your Mac. Repeat this process for any other network locations you want to create. Note that it usually helps to wait until you’re physically in the location to create the network location. That way, all of the network interfaces and connections will be active, and you’ll have fewer settings to change.
Switching Between Network Locations
OS X can’t automatically switch between the network locations that you create - you must switch between them manually. Fortunately, this is a quick and easy process that takes only a couple seconds. From the Apple menu, select Location, and then select the network location you want to activate, as shown below.

You can also change network locations by using the Network pane in System Preferences. After you select the network location, all of the network settings you’ve specified for that location will become active.