Controlling AirPort Network Access with Time Limits
Matt Cone April 9, 2013 Tutorials AirPort Network
If you own an AirPort base station, you can use the Timed Access feature to control the days and times when users access the internet. This could come in handy in a variety of situations. For example, if you own a cafe and provide free wi-fi access, you can configure the AirPort to block all access to the internet when your business is closed. And if you have children, you can set time limits for specific devices in your home.
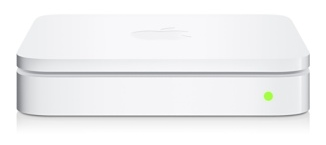
There are two ways to use the timed access feature. You can create a default allow policy to allow all devices to access the internet at any time, and then specify custom schedules for specific devices. Or you can create a default deny policy to prevent all devices from accessing the internet according the schedule you specify, and then exempt specific devices by creating custom schedules.
Here’s how to control AirPort network access with time limits:
Open the AirPort Utility application. (It’s in Applications → Utilities.) The window shown below appears.
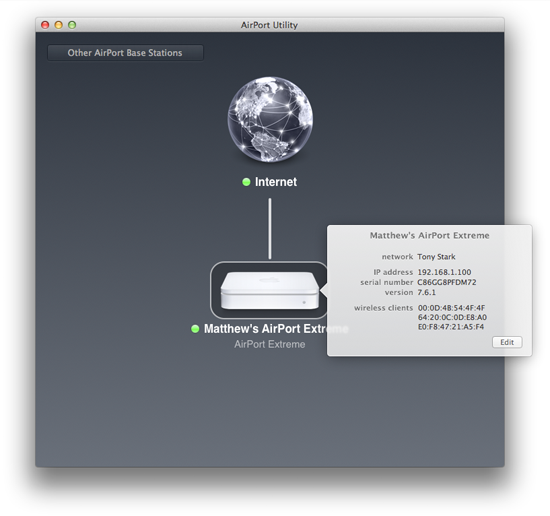
Click the AirPort Extreme’s icon. The status pop-up window appears.
Click Edit. The settings window appears.
Select the Network tab. The window shown below appears.
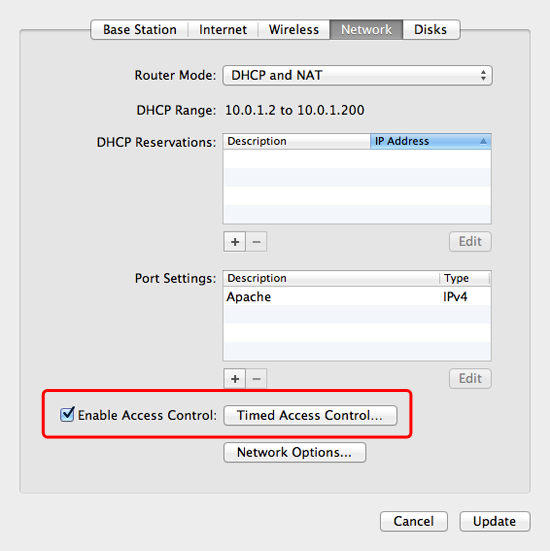
Select the Enable Access Control checkbox.
Click Timed Access Control. The window shown below appears.
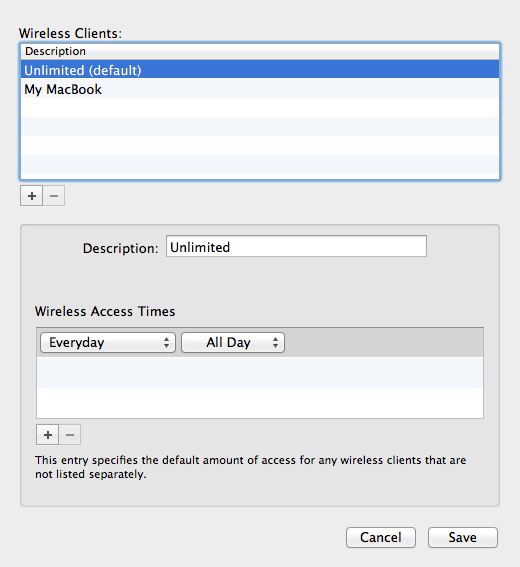
Select the Unlimited (default) option. By default, this allows all of the devices connected to your AirPort to access the internet all day, every day, but you can change this to block internet access for all devices (except the ones you specify later) during the times you set.
If you’d like to limit the days and times that a specific device can access the internet, click the + button under the Wireless Clients field. The window shown below appears.
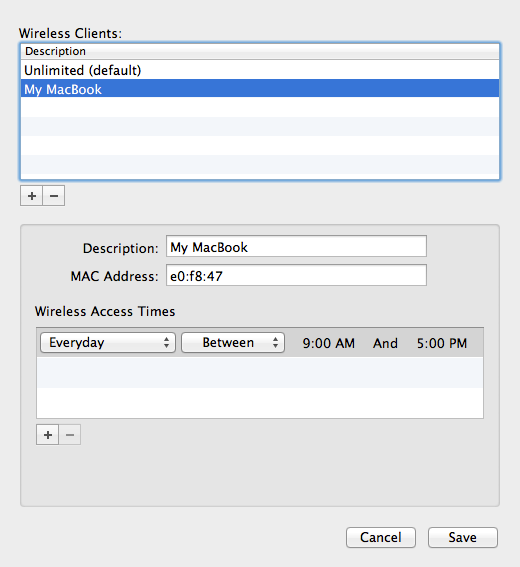
Enter a name for the device in the Description field.
Enter the device’s MAC address in the MAC Address field. You can use the following tutorials to find the device’s MAC address.
Use the + button under the Wireless Access Times field to create a schedule for this device’s internet access.
Once you’ve added all of your devices and customized the schedules, click Save.
Click Update. The AirPort will restart to apply the changes.<
Congratulations! You have successfully set time limits for the devices connecting to your AirPort network. The schedule you created is effective immediately.
Subscribe to our email newsletter
Sign up and get Macinstruct's tutorials delivered to your inbox. No spam, promise!