How to Change Your iPhone's DNS Servers
Matt Cone January 14, 2021 Tutorials iPhone Network
Just like in macOS, you can change the DNS servers on your iPhone. This can significantly speed up Safari and other iPhone apps that use the Internet. For a general introduction to DNS, and to learn why you would want to change the DNS servers on your iPhone, see How to Change Your Mac’s DNS Servers.
Before we start, you should know a couple things about how iOS handles DNS. First, these instructions only work for Wi-Fi connections - iOS does not allow you to change the DNS servers when connected to cellular networks. Also, the changes are network specific, so you’ll need to change the DNS servers every time you connect to a new wireless network. The good news is that iOS remembers the settings, so you won’t have to do anything the second time you connect to a network.
Here’s how to change your iPhone’s DNS servers:
From the iPhone’s home screen, tap Settings.
Tap Wi-Fi. The available wireless networks in range of your iPhone appear, as shown below.
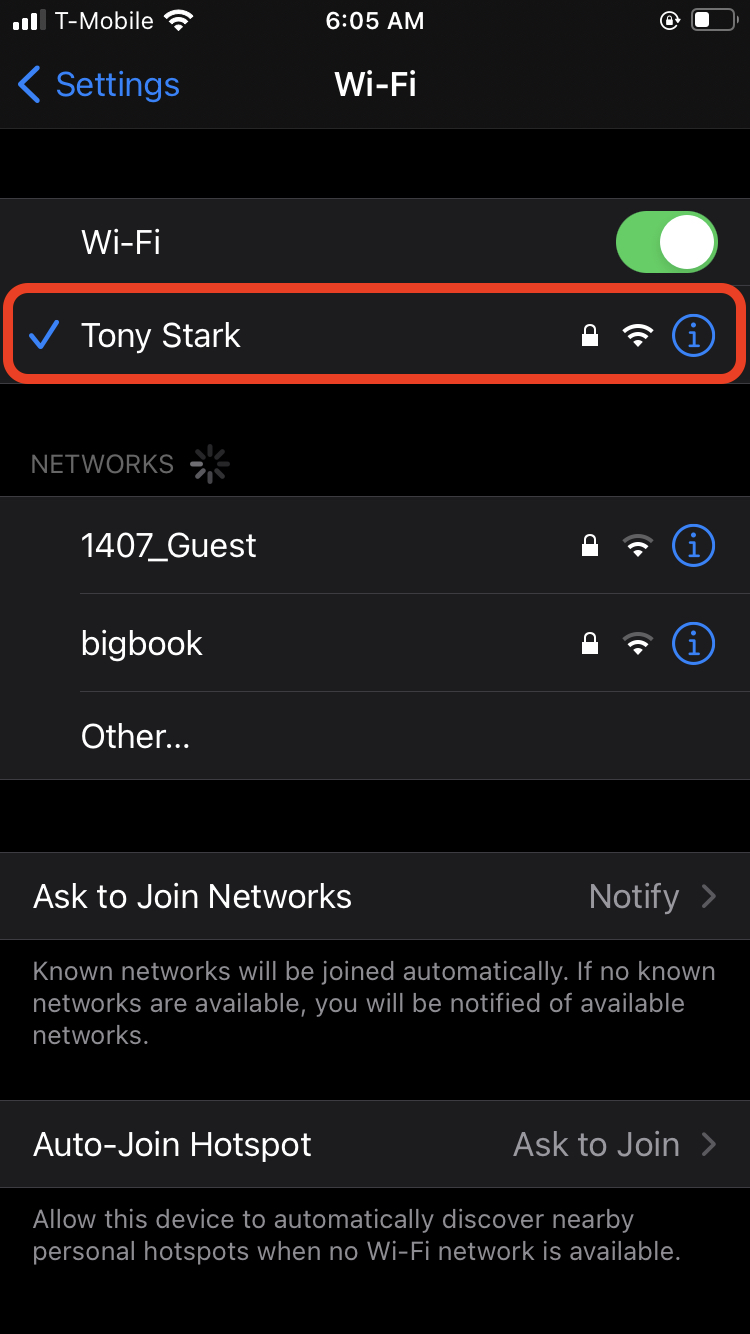
Tap the connected Wi-Fi network. The window shown below appears.
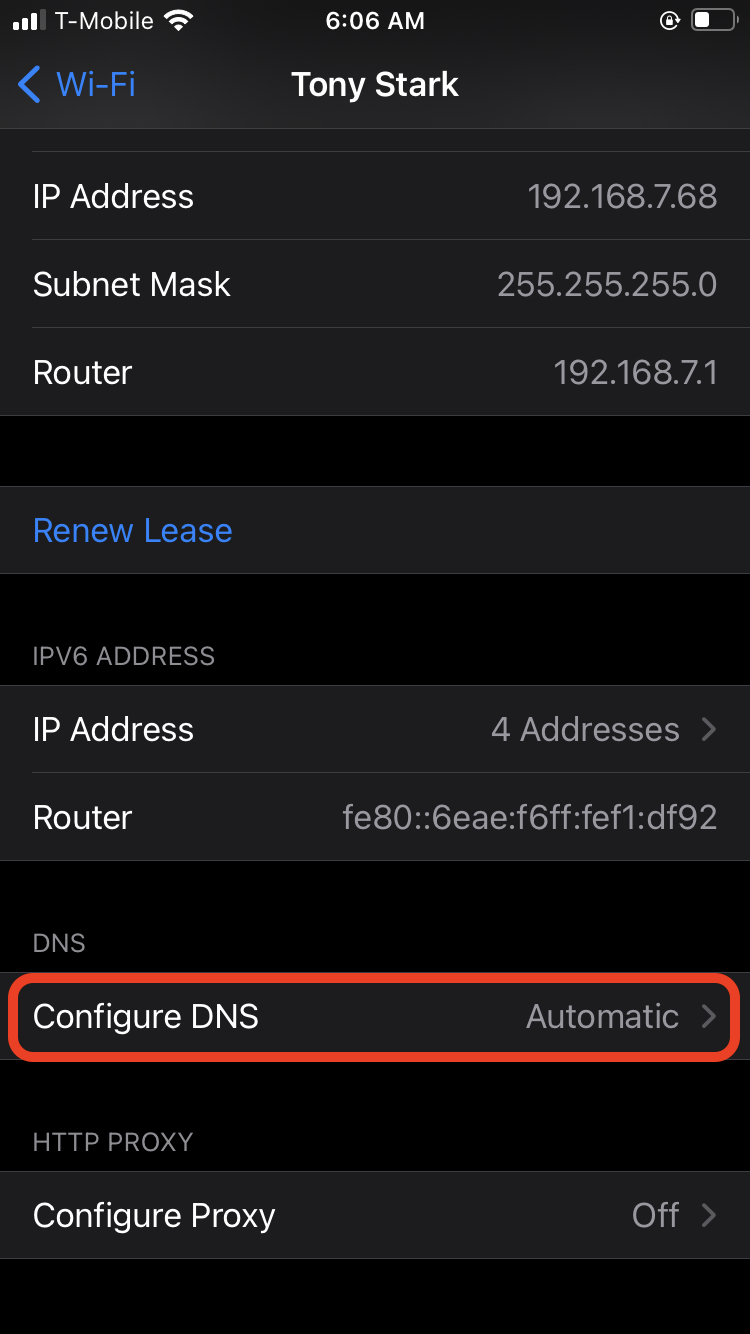
Tap Configure DNS
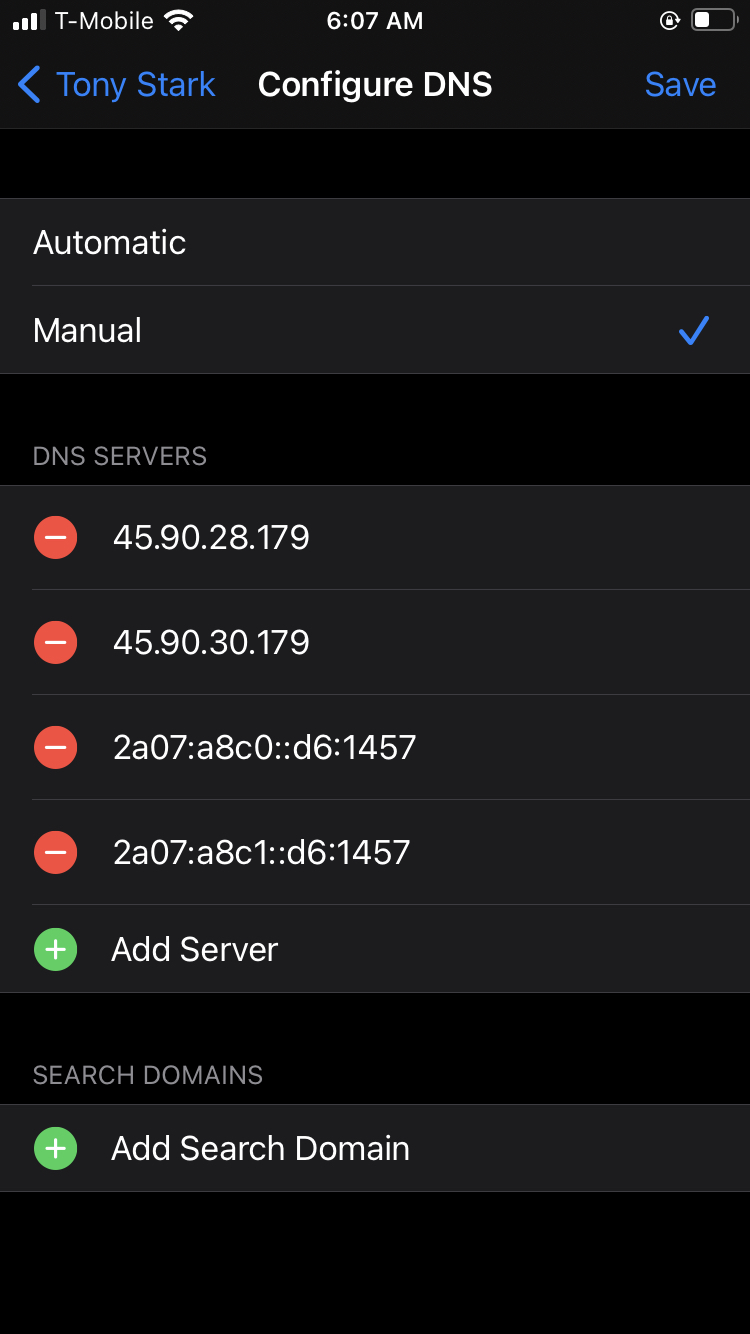
Tap Manual.
Delete the current DNS servers and enter the new DNS servers.
- To use Cloudflare DNS, use the following DNS servers:
1.1.1.11.0.0.12606:4700:4700::11112606:4700:4700::1001
- To use Google DNS, use the following DNS servers:
8.8.8.88.8.4.42001:4860:4860::88882001:4860:4860::8844
- To use Cloudflare DNS, use the following DNS servers:
Tap Save.


That’s it! You’ve updated your iPhone’s DNS servers!