Enabling the iPad's Audio Equalizer
Matt Cone February 5, 2021 Tutorials iPad Music
It seems ridiculous now, but in high school I purchased a Pioneer stereo system capable of pumping out over 1,000 watts of sound. The speakers and components were huge. It took three car trips just to get everything home from the store! The only thing I miss about that system is the equalizer on the amp, which allowed me to adjust the output of the sound levels.
Believe it or not, your iPad has an audio equalizer too. It’s not as fancy as the physical ones that allow you to manually adjust the levels, but it has a number of presets that will dramatically improve the sound quality of the music you play on your iPad. Unfortunately, the iPad’s equalizer only changes the audio from the Music app. Audio produced by other apps, such as Videos or YouTube, won’t be changed by the equalizer.
Here’s how to enable the iPad’s audio equalizer:
For best results, connect a pair of high-quality headphones to your iPad and start playing music. This will allow you to test the equalizer presets and hear the subtle differences between presets.
From the iPad’s home screen, tap Settings.
From the sidebar, tap Music. The screen shown below appears.
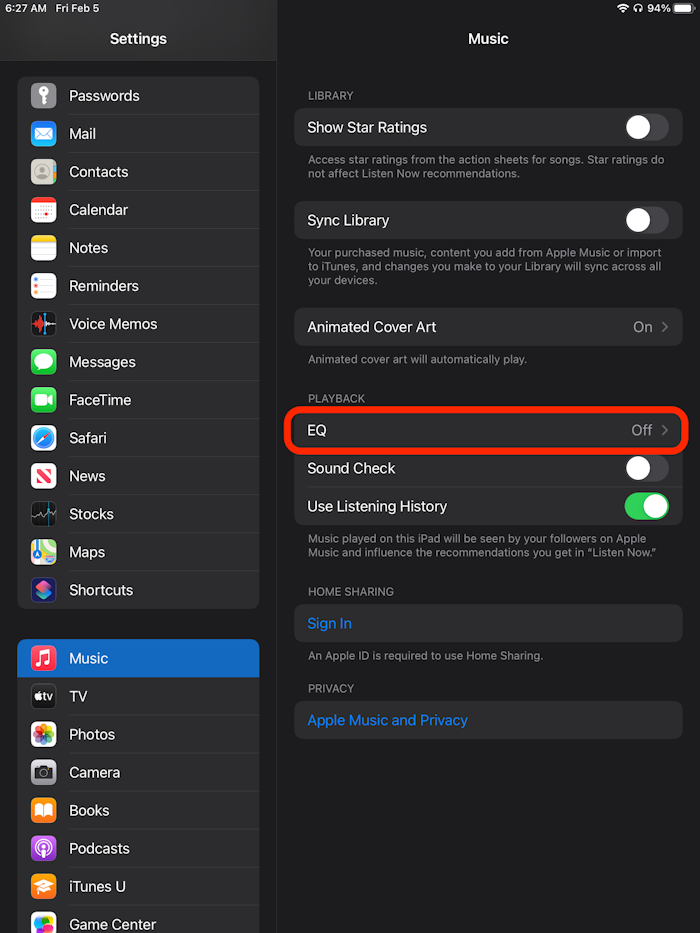
Tap EQ. The screen shown below appears.
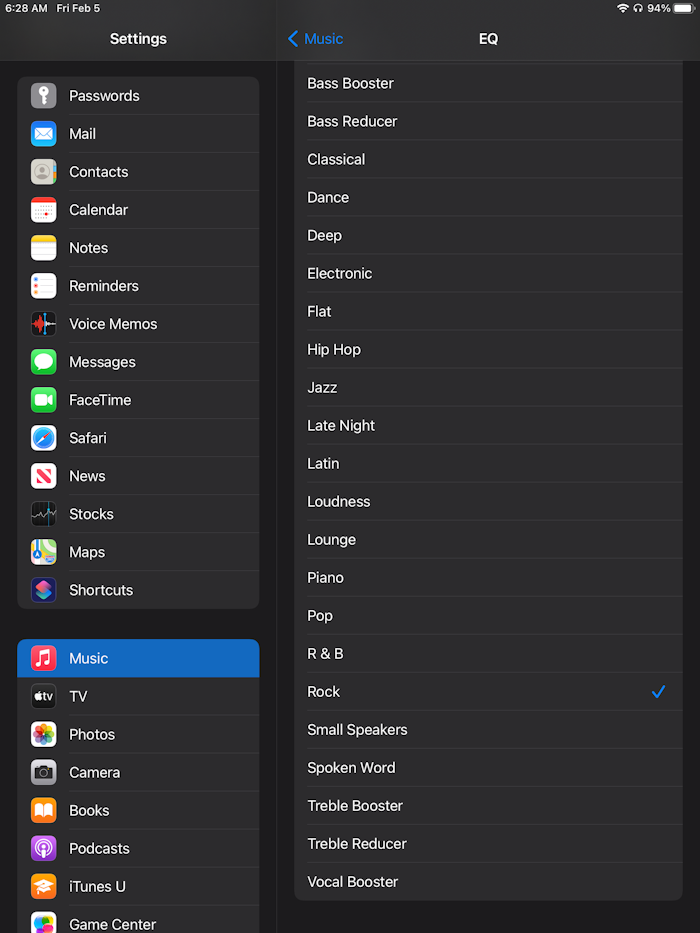
Tap a preset, such as Rock. The key is to select a preset that matches the type of music you normally listen to. Keep tapping presets until you find one you like.
That’s it! You’ve set up your iPad’s audio equalizer, and it will stay set to the preset you selected until you change it. Can you hear the difference yet?
Related Articles
Subscribe to our email newsletter
Sign up and get Macinstruct's tutorials delivered to your inbox. No spam, promise!