Keep Track of People with Address Book
Eric Buczynski April 6, 2007 Tutorials Mac Apps
Every Mac ships with a great little organization application called Address Book. This Apple program can help you keep track of friends and family, and it integrates seamlessly with other Apple applications, like Mail.
If you’re new to Address Book, you’ll find it to be a very comprehensive way of keeping track of contacts, friends, email lists, and more. There’s so much power packed into Address Book that you’ll wonder why you didn’t use it sooner! But even if you already use it, we’ll cover a few more tips that will make it easier to keep track of current contacts. Enough with the formalities! Let’s get to work.
Adding Contacts
First, open the Address Book application. You can find it on your Dock or in your Applications folder. When Address Book opens, you’ll see a screen similar to the one below. Obviously, we’ve already added a lot of contacts.
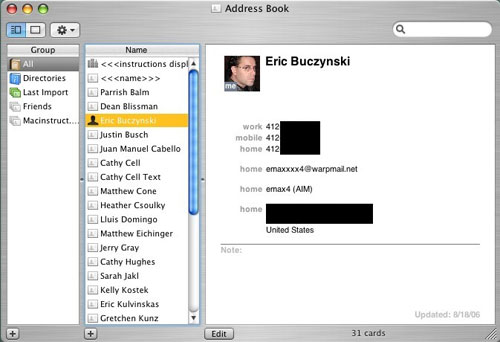
To add a new contact, simply select New Card from the File menu, or click the plus sign button at the bottom of the window, where the list of contacts are located. A new card will appear with the data in gray – this means Address Book is ready to take the information.
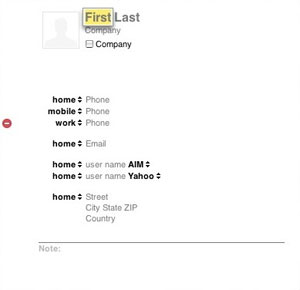
As you can see, Address Book lets you type in a lot of information for each contact. But it’s just not limited to things like phone numbers, email addresses, Instant Messenger usernames and physical addresses. By selecting Preferences from the Address Book menu, and then clicking on the Template tab, you can select the default types of information that will be on every address card you add. Select Add Field from the Card menu to add a field to the template. You can choose to add fields for the addressee’s prefix, suffix, middle name, nickname, job title, department, maiden name, title, URL (if they have a website), related names, and even their birthday. How’s that for flexibility?!
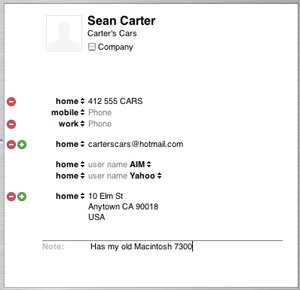
Now we’re going to add a friend to Address Book. Using our template, we’ve added some (false) information about him, and even a note at the bottom of the card. You’re not limited to just entering a person’s home or work number either. You can select “other,”, or even select “Custom” and make your own custom name, such as “cellphone 2,” “parent’s house,” or whatever. The same is also true for the email address and physical address. With the physical address you can choose the format of the country so that the zip code or state follows a separate line. Since the person’s instant messenger usernames aren’t added, they won’t be shown on the card itself. That goes for everything else, too – only information entered on the card will be shown.
Adding Pictures for Contacts
Now that we’ve finished entering our friend’s information, we’re going to add his picture. This is cool, because it not only shows up in Address Book, but on emails we receive from him (if you use Apple’s Mail application). You can either select Choose Custom Image from the Card menu, or double-click the blank silhouette icon next to the person’s name. It will bring up the screen shown below:
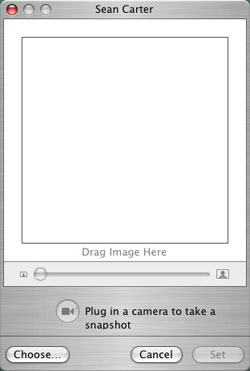
To make an icon for the person in Address Book, drag a graphic file on to the white square. Click the Choose button and select a file from an available drive, or select picture from an open file and drag it onto the white square. For some reason, you can’t drag a picture from Preview to the square, but copying the selection and then pasting it into the area happens to work.
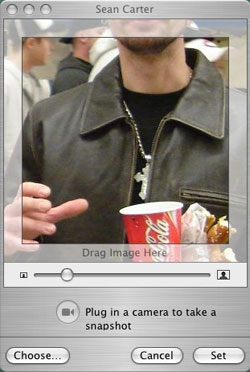
Now that we have the picture in Address Book, simply clicking and dragging the picture in the square will allow you to center the area you want to keep.
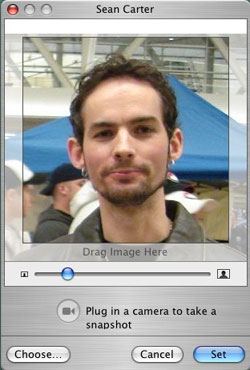
That looks pretty good, but what if you want to experiment with the picture’s size? Moving the slider to the right decreases the size of the picture.
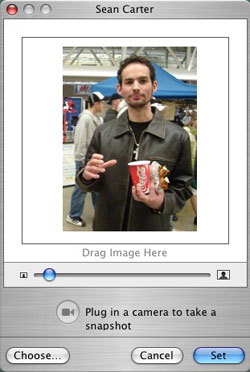
Moving the slider to the extreme right decreases the window size for the picture.
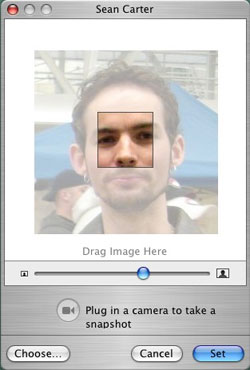
But don’t worry about the picture’s size too much. Even if you’ve maximized the size of the picture, Address Book will automatically scale the picture so it fits properly. Once you’ve chosen the picture and a decent head shot, press Enter or click the Set button.
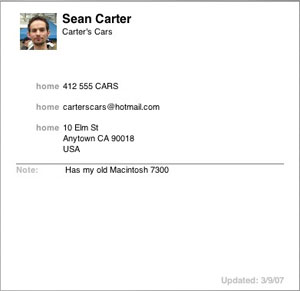
Now we have the person’s contact information and picture stored in Address Book. When you get an email message from this person, you’ll see a little picture of the person in the email itself. This is especially helpful if you have two people with the same name in your contact list and you’re not sure which person sent the email. (Photo shown in email message below is smaller than the actual size of the picture in Address Book.)

Now when you use Apple’s Mail application, you’ll be able to retrieve the same information in Address Book without opening the program. Mail will give you the option to make changes to a card, but making any edits will open the Address Book program.
Do Even More With Address Book
When you select an person your list of contacts, then click the sprocket drop-down menu, you have more options. Selecting Print will bring up a box that is designed to print the person’s name on an envelope. You can also send the individual an email message or do a Spotlight search for the person’s name.
Address Book also allows you to make backups of the contact database and revert to a saved, older version of a database. In the Preferences menu, you can also check off an option that will email everyone in your contact list whenever you make changes to your own contact card.
Contacts are pretty easy to work with. You can create a new group, and then click and drag names from the “All” group into the newly added group. One can even make another group and copy the same contacts minus a few. This is useful if you usually email your whole office, but sometimes prefer to mail everyone in your office except the administration. When you select a group, you can right click on it and choose “Send Email to (group name).” What will happen is your Mail application will open (if it’s not already open) and a blank email window will appear with all the names in that particular group.
Now that you’ve got the hang of Address Book, you can finish adding the rest of your contacts!
Subscribe to our email newsletter
Sign up and get Macinstruct's tutorials delivered to your inbox. No spam, promise!