Upgrade Your MacBook Pro's Hard Drive
Matt Cone June 2, 2012 Tutorials Mac Hardware
Upgrading the hard drive is a cost-effective way to increase your storage space and speed up your MacBook Pro, especially if you purchase a solid-state drive. Hard drives are like processors and other electronic components - their capacity doubles approximately every two years. If you plan on keeping your MacBook Pro for longer than two years, you’ll want to consider upgrading your hard drive at least once.
Finding a New Hard Drive
There are two different types of drives available: Hard disk drives (HDD) and solid-state drives (SSD). Solid-state drives are more expensive than conventional hard disk drives, but they have numerous advantages.
Solid-state drives have no moving parts, so they can access data virtually instantaneously - providing a significant performance increase when compared to hard disk drives. Buy a solid-state drive if you can afford it. We recommend the Crucial 256 GB drive (currently $199.99) shown below.

Hard disk drives have physical disks that need to spin up before information can be retrieved. If you’re looking to purchase one of these drives, be sure to purchase the fastest drive you can afford - higher speeds are better. We recommend the Western Digital 750 GB drive (currently $99.24) shown below.

Of course, there are many other hard drives available for your MacBook Pro. Use Amazon’s website to find the best deals. They have a wide selection of low-cost, high-capacity drives perfect for the average MacBook Pro user.
Backing Up Your Old Hard Drive
Since you’ll be removing your current hard drive from your Mac, you’ll first need to backup or clone that hard drive to an external hard drive. After you install the new hard drive, you’ll restore the exact copy of your old hard drive to the new one. For instructions, see Back Up (Clone) Your Mac’s Hard Drive with SuperDuper!.
Be sure to test the backup before you remove the current hard drive. For instructions, see How to Test Your SuperDuper! Backup.
Upgrading Your MacBook Pro’s Hard Drive
If you’ve ever upgraded your Mac’s RAM (for instructions, see How to Upgrade Your MacBook Pro’s RAM), you’re already somewhat familiar with the procedure for installing the hard drive. All of the precautions we mentioned in that tutorial also apply here. Make sure you’re working in a clean environment free of static electricity, and plan to spend about half an hour performing the replacement. Assemble your tools once you’re ready!
Here’s how to replace the hard drive:
Disconnect the power cord and turn your Mac over.
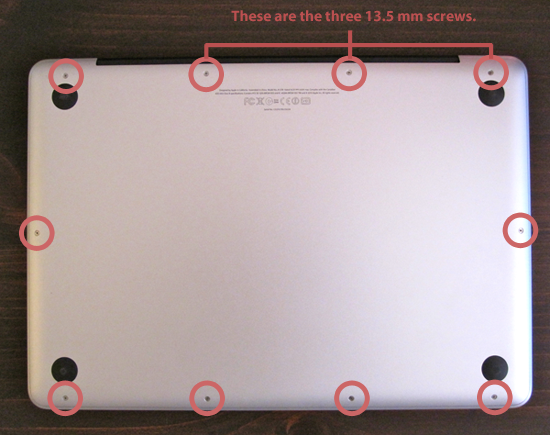
Remove the ten screws on the back of the case. There are seven 3 mm screws, and three 13.5 mm screws, as shown below. The screws are very small—don’t loose them!
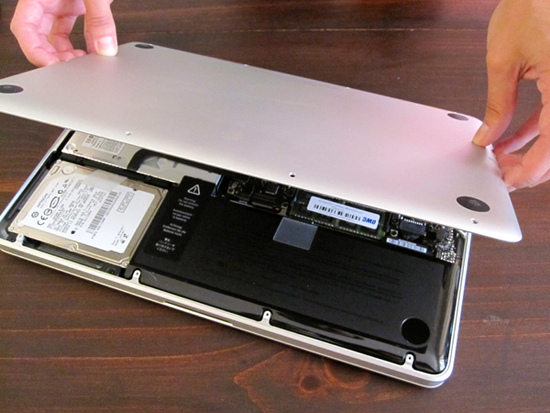
Gently lift the case backing and tilt it towards the rear of the computer, as shown below.
Touch a metal surface inside the computer to discharge any static electricity from your body.
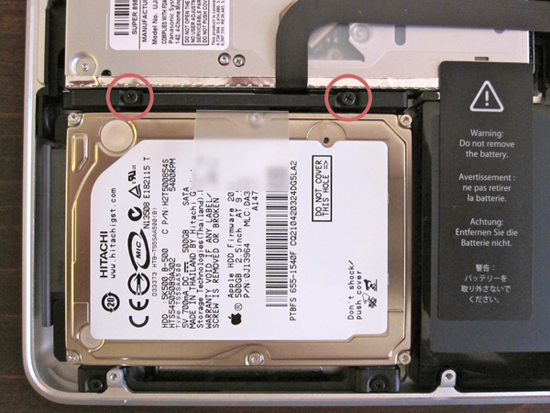
Remove the two Phillips screws from the hard drive bracket, as shown below.
After you have removed the screws, lift the hard drive bracket out of the case, as shown below.
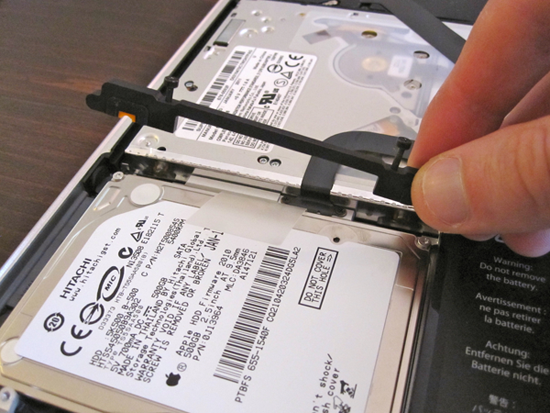
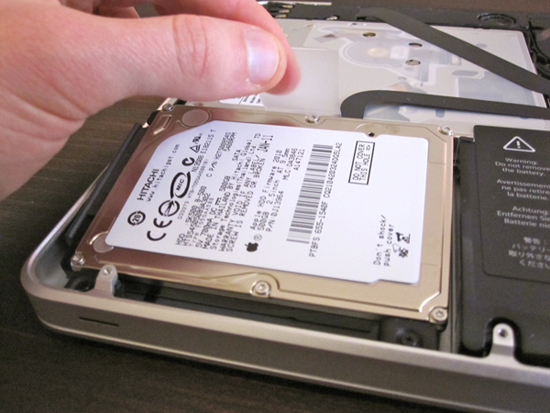
Gently lift the hard drive out of its case by its plastic tab, as shown below. Be careful not to pull the drive too much - it’s still connected to your Mac.
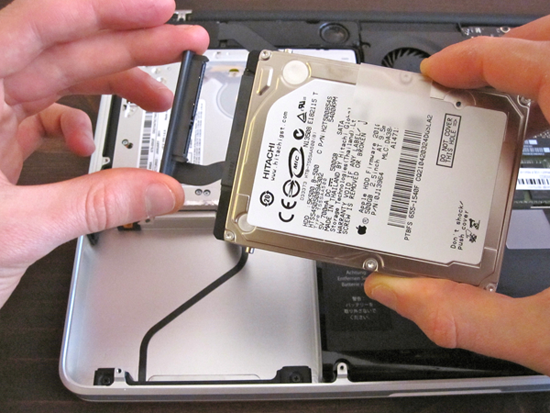
Remove the connector cable from the hard drive by pulling it straight out, as shown below.
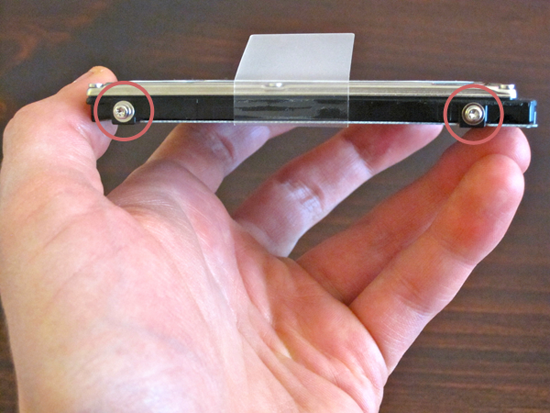
Remove four T6 Trox screws from the hard drive, as shown in Figure 50-7. There are two screws on either side of the hard drive.
Replace and tighten the T6 Trox screws in to the new hard drive.
Insert the connector cable in to the new hard drive.
Gently place the new hard drive in to the case.
Place the hard drive bracket onto the case.
Replace and tighten the Phillips screws in to the hard drive bracket to attach it to the case.
Gently place the case backing onto the top of the case.
Replace and tighten the screws.


Congratulations! Your new hard drive is now installed in your MacBook Pro.
Restoring Your Hard Drive
Now you have a brand new hard drive in your MacBook Pro, but it doesn’t have an operating system installed. You’ll need to boot from your backup drive and then restore the backup to your new hard drive. For instructions, see How to Restore from a SuperDuper! Backup.
Reusing the Old Hard Drive
What should you do with your old hard drive? Consider purchasing a hard drive enclosure to use it as an external USB hard drive. We recommend the Vantec NexStar hard drive enclosure (currently $7.99) shown below.

After you receive the enclosure, follow the instructions to install your old hard drive. The resulting product will look a lot like an external hard drive. Just connect the USB cable to your Mac and you’ll be able to access your old hard drive! It’s a great way to keep it out of the recycling bin.