Use BBEdit's Clippings Menu to Optimize Workflow
Justin Busch June 4, 2007 Tutorials Mac Apps
We’ve written a lot about TextWrangler, the free text editor from Bare Bones Software. In fact, we like TextWrangler so much that we included it in our list of 20 must-have Mac apps. But if you’re a Mac power-user or programmer, there’s nothing like BBEdit - TextWrangler’s big brother. It has all sorts of cool stuff, like the clipping menu.
To start using the BBEdit clippings menu, you’ll need to launch BBEdit. If you have it installed, you can double-click its icon in the Applications folder. Once it launches, you’ll probably see the new document screen:
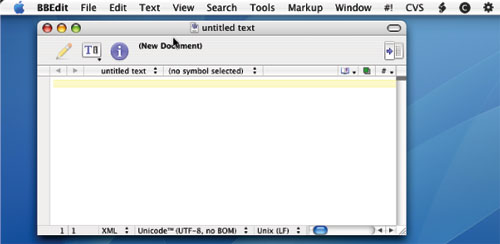
The Clippings menu is a repository of text/code pieces available to you at the click of the mouse. BBEdit comes with several pre-built clipping sets for things like HTML, Cascading Style Sheets, C source code, and more. To begin using one of the pre-built clipping sets, select the Clippings menu (the © icon in the menu bar). Next, select the Change Set sub-menu, and then select one of the predefined clipping sets.
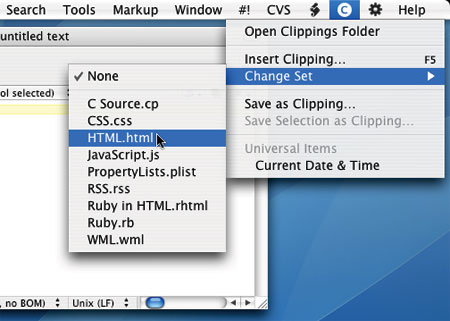
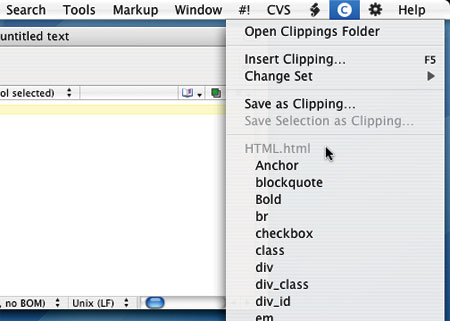
By selecting the HTML.html clipping set, for example, the Clippings menu changes to display the various clippings. In this case, the Clippings menu displays HTML tags, or groups of tags.
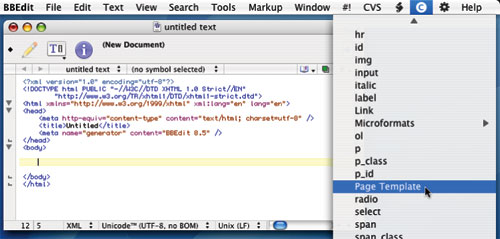
To insert a clipping, select the item in the menu to insert the clipping at the cursor’s current location in the document. For example, selecting Page Template from the Clippings menu will insert a basic HTML page template, including document definitions, the head tag and elements, and the body tag.
Create Your Own Clippings
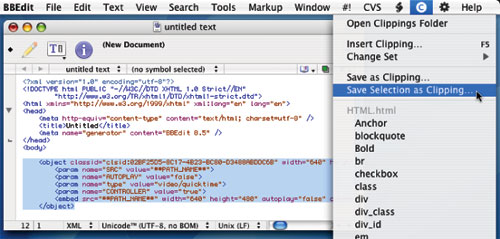
The clippings provided by Bare Bones Software are exceptionally helpful, but they’re not always complete. You may find yourself repeatedly typing the same line of text, or code. In this situation, you can create additional clippings. Begin by typing the text to be used as a clipping. Next, select that text by clicking and dragging until it is completely selected. From the Clippings menu, select “Save Select as Clipping…”
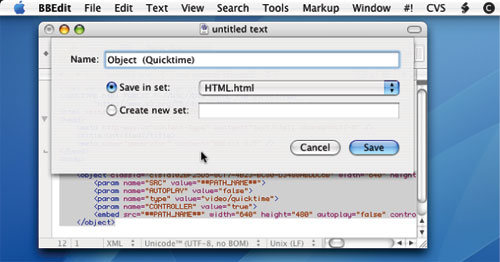
A dialog panel will appear over the document. Enter a descriptive title in the name field for the new clipping. Next, decide if this clipping is best suited in one of the existing clipping sets (by selecting an item from the “Save in set:” menu), or if a new clipping set is more desirable - for example, creating a clipping set for blog-specific tags. Click Save to save the clipping.
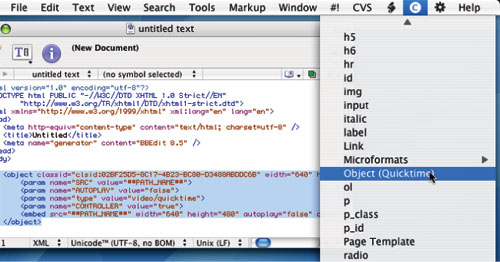
The newly creating clipping can now be used exactly like the other clippings - just open the clipping menu and select the item. The clipping will be inserted at the cursor!
Subscribe to our email newsletter
Sign up and get Macinstruct's tutorials delivered to your inbox. No spam, promise!