How to Use Gmail With Apple's Mail
Stephen Korecky July 11, 2007 Tutorials Mac Email
Do you have a Gmail account? Do you know that Google’s free email service works with Apple’s Mail client? It does, and it’s pretty nifty! Using Gmail with Mail.app means that you won’t have to use Google’s website to send and receive email messages, and you won’t have to look at those pesky text advertisements Google displays next to your messages.
Here’s how to use Gmail with Apple’s Mail:
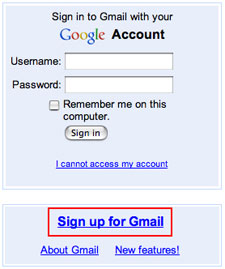
If you don’t already have a Gmail account, you’ll need to get one. It’s free, and it only takes a couple minutes to sign up. Just head on over to https://www.gmail.com and click the Sign up for Gmail link.
After you’ve registered, log into Gmail. Once you’re logged in, click the Settings link in the upper right-hand corner, and then select the Forwarding and POP tab.
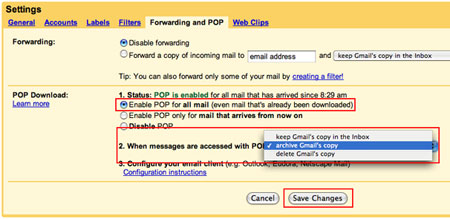
To enable POP mail access to your Gmail account, select either of the first two options. Just make sure you select an option that Enables POP.
Tell Gmail what you want it to do after you read your messages in Apple’s Mail. You can “Keep Gmail’s copy in the Inbox,” “Archive Gmail’s copy,” or “Delete Gmail’s copy.” It’s up to you. We chose Archive, because we like having a backup of our email in case things go wrong on our Mac. Gmail offers plenty of storage space, so archiving your email usually isn’t a problem.
Click Save Changes. We’re now finished with Gmail - time to move on to Apple’s Mail.
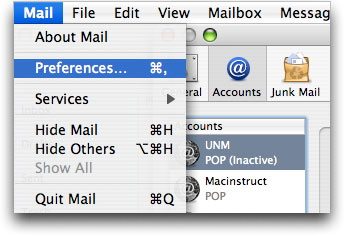
Open Mail. From the Mail menu, select Preferences. Select the Accounts tab.
Click the + button in the bottom left-hand corner of the window. This tells Mail that you want to create a new account.
Enter the following information:
- Account Type: POP is what we’re going to be using.
- Account Description: This is what we want to call our account.
- Full Name: Your name as it will appear in the email messages you send.
- Email Address: Your Gmail email address.
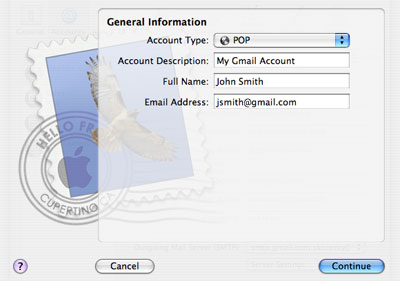
Click Continue.
Enter the following information:
- Incoming Mail Server: This is the POP server. For Gmail, we’ll use pop.gmail.com
- User Name: This is your (full) email address.
- Password: The password you set when creating your account.
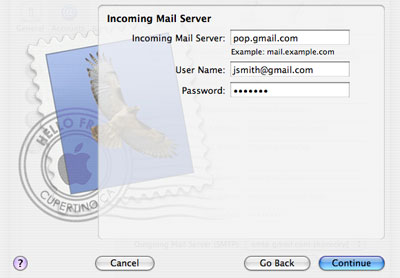
Click Continue.
Make sure the Use Secure Sockets Layer (SSL) checkbox is checked. (This is required for Gmail, and it’s also a good security measure.) Set Authentication to Password.
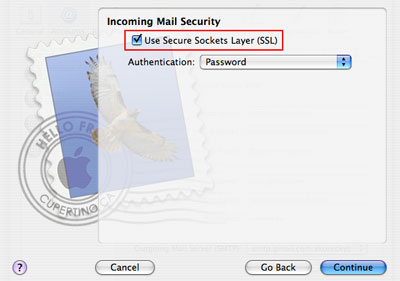
Click Continue.
Enter the following information:
- Outgoing Mail Server: This will be set to smtp.gmail.com
- Use Authentication: Make sure this checkbox is checked.
- User Name: This is your (full) email address.
- Password: The password you set when creating your account.
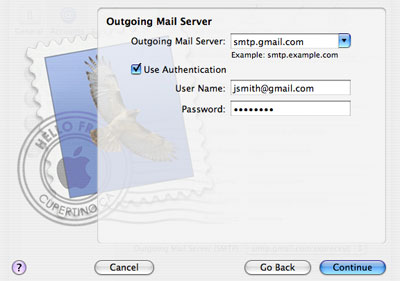
Click Continue.
Make sure the Use Secure Sockets Layer (SSL) checkbox is checked. (This is required for Gmail, and it’s also a good security measure.) Set Authentication to Password.
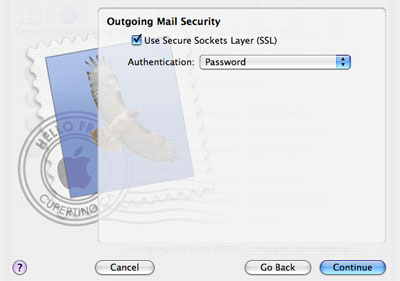
Click Continue.
We’re done! Your setup should look very similar to ours. However, there are still a couple things we need to check before we start sending and receiving email. We just need to make sure that Mail did everything it was supposed to do.
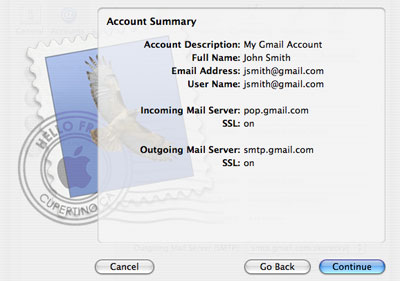
Click Continue. You’ll be back in the Mail account preferences.
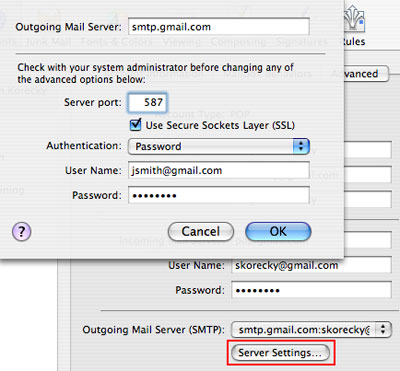
Click on Server Settings. Make sure everything looks correct, and make sure the server port is set to 587, not 25. (If port 587 doesn’t work, you can try 465.) When you’re finished, click OK.
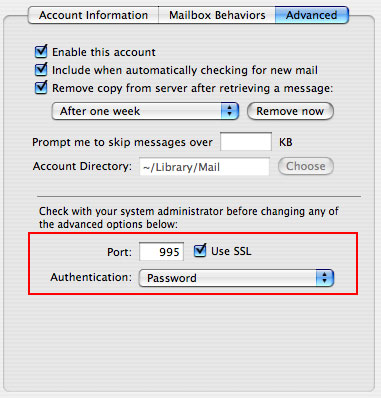
Select the Advanced tab. Make sure that Mail is set to Use SSL on Port 995.
That’s it! Enjoy using Gmail with Apple’s Mail!
Subscribe to our email newsletter
Sign up and get Macinstruct's tutorials delivered to your inbox. No spam, promise!