Advanced AirPort Extreme Configuration
Stephen Korecky April 16, 2007 Tutorials AirPort Mac Network
In last’s week Nerdification Station, we covered AirPort Extreme basics. We showed you how to use the Airport Utility for the first time, and we walked you through the entire AirPort Extreme set up procedure. If you read that article and followed along with your own AirPort Extreme Base Station, you should have a working, password-protected wireless network.
So what do you do now? Start tweaking!
We’re not going to cover every detail of the AirPort Extreme, because we’d be here all day if we did! Most of you you won’t need to change all of the options anyway unless you’re using multiple AirPorts in an office environment. Let’s open the AirPort Utility: Applications > Utilities > AirPort Utility.app
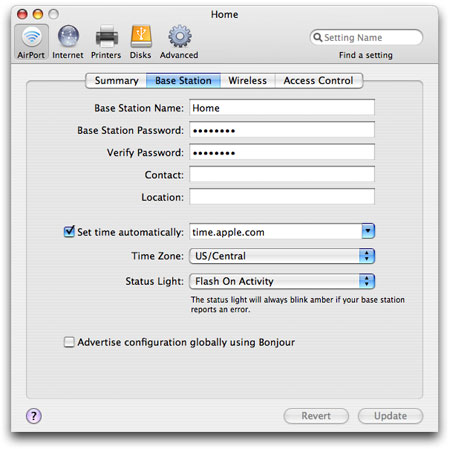
The Base Station’s name and password are already set, but if you want to change them you can do so here. (Note that this is not the name of the SSID or the password that you use to log into your wireless network. It’s just your AirPort Base Station password.) You can set the time and change a few other settings in here.
Wireless Network Set Up and Security
Click the Wireless tab. This is where you’ll set all your wireless preferences, like your wireless network name (SSID) and your password. We strongly recommend using WPA2 for your wireless security. WPA2 is the most secure option, and you can use any characters to create a password, including something like (*^#Gga&#.
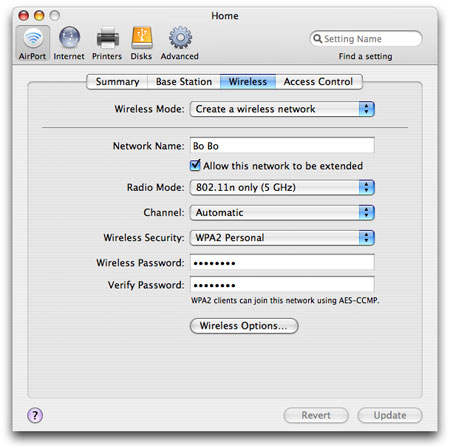
Here you can also set the Radio Mode. This means that if you have a few computers using anything from wireless A to N, you can broadcast all signals, or just G and N, or just N. We chose 802.11n (5GHz), because that will give us a stronger signal and extended range on our MacBook Pro Core 2 Duo. Choose what works best for you. As far as the channels go, we just leave it set to Automatic for ease of use.
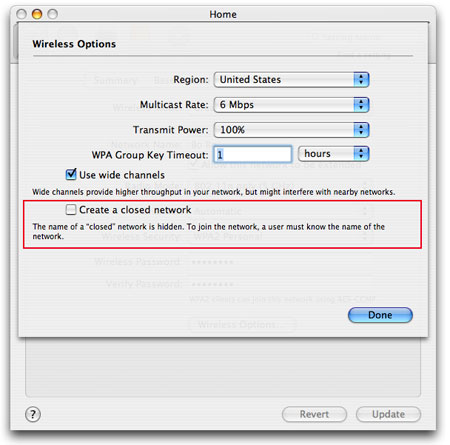
You can hide your SSID so people won’t be able to see your network name (i.e.: “ScoobyDoo”) when looking for wireless networks. This also helps prevent people from “War Driving" and bootlegging your Internet connection. How you do this? Click the Wireless Options button, and then select the “Create a closed network” checkbox. That will hide your network name for further security. You can also limit transmitting power – play around and see what works best for you.
Controlling Access to Your Network
Kids up all night? On a school night?! (See also Macinstruct’s Internet Safety for Families.) Click the Access Control tab, add their computer’s MAC address, and specify the times they can use the Internet. If they try to access the Internet outside of the times you specify, they’ll be denied access.
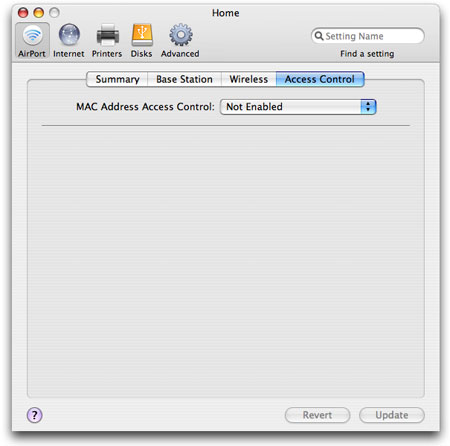
This window also has an option called RADIUS, which Apple defines as:
Remote Authentication Dial-In User Service (RADIUS) is a client/server protocol that allows remote access servers to authenticate wireless users against a central database, eliminating the need to maintain user information on each AirPort Base Station in the network.
If you’re setting up multiple AirPorts in your office, you can control who uses them from a central database!
Tweak Your Internet Connection
If you’re unable to connect to the Internet, you might want to double-check your Internet Connection settings. Just click the Internet button.
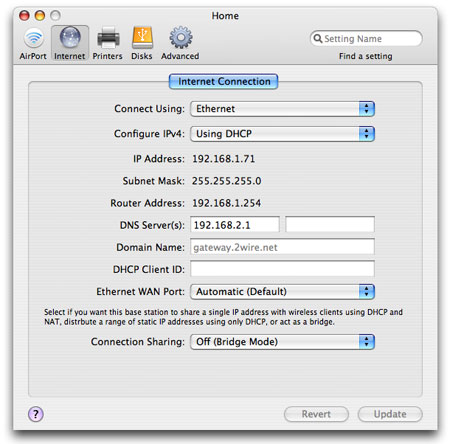
As we mentioned in last week’s article, you should probably be using DHCP.
Networking a Non-Network Printer
Printer set up couldn’t be easier! This will allow anyone using your wireless network to print to your printer. Just plug in your printer and the AirPort Utility will detect it.
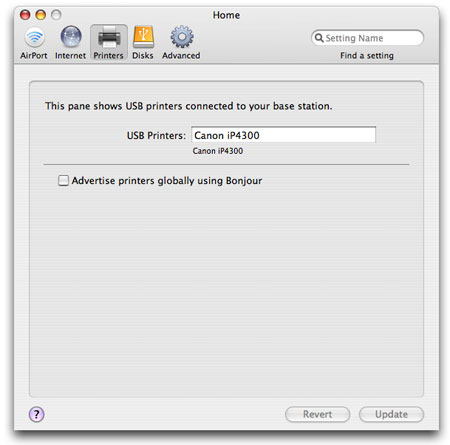
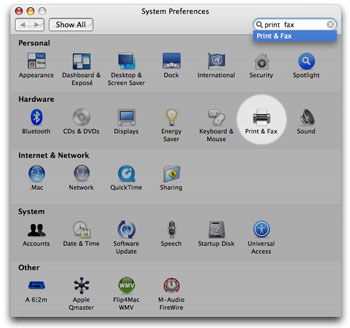
Then, select System Preferences from the Apple menu. Select Print & Fax.
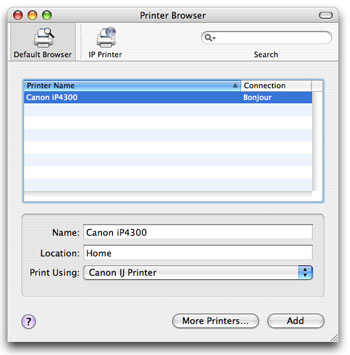
Click the + button to add a printer.
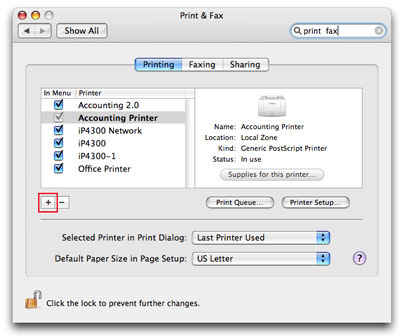
Now just select the printer, click the Add button, and you’re all set.
Feel free to email me if you have questions or comments! You may have noticed that we skipped over the AirPort Disk option. We’re saving this for another article. Look forward to it!
Related Articles
- How to Set Up the AirPort Extreme
- How to Connect a Hard Drive to the AirPort Extreme
- How to Hide Your AirPort Extreme Network
- How to Use Your Mac as a Wireless Router
Subscribe to our email newsletter
Sign up and get Macinstruct's tutorials delivered to your inbox. No spam, promise!