Do More With Dashboard
Matt Cone April 17, 2007 Tutorials Mac
Dashboard is one of the coolest Mac applications, isn’t it? It’s easy-to-use, it’s beautiful, and it wows your PC-using friends every time. With the push of a button, all of your widgets zoom into view and you have information at your fingertips!
If you pack your Dashboard with widgets, like we do ours, you’re probably looking to trick out your ‘board even more. You know – take things even further to wow your friends again and again. We’ve got just the tips for you.
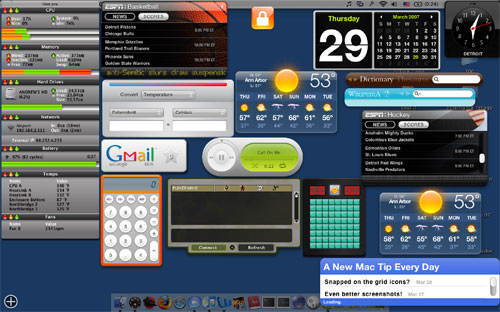
For those who don’t know, Dashboard is an application that collects “widgets” – mini-applications that are designed to perform a couple small tasks, such as retrieve information from a news website. Dashboard is included with Mac OS 10.4, and it automatically launches when you start up your Mac. You can find it in your Applications folder, or (by default) on the Dock next to the Finder. You can also access it by pressing a key on your keyboard, which is set to F12 by default.
Change Dashboard’s Keyboard Shortcut
Dashboard is, as we said, accessible by pressing the F12 key on your keyboard. But this default setting can cause problems on older Apple portables, which use F12 as the eject button, and some after-market keyboards, which also use F12 as the eject button. Fortunately, you can associate a different key with Dashboard. Here’s how to do it:
From the Apple menu, select System Preferences.
Select Dashboard & Expose.
From the Dashboard option, select the function key you’d like to associate with Dashboard.
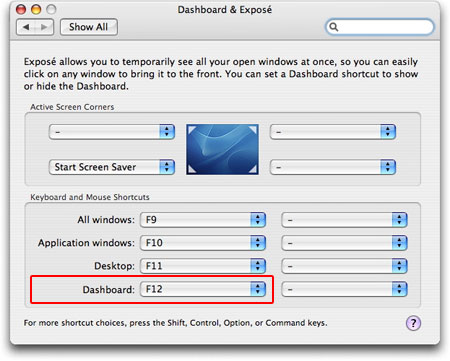
Close your System Preferences.
Go Get ‘Em, Tiger! (What Are Widgets?)
Widgets are mini-applications that sit on your Dashboard. Widgets can do lots of things, like display the time, the exact operating temperature of your processor, and the speed of the fan inside your Mac. You can also have multiple versions of a particular widget open. For example, on our Dashboard, we have three instances of the ESPN widget open showing three different sports scores. Mac OS 10.4 comes pre-installed with 18 widgets that are pretty cool – check them out!
When you tire of the pre-installed widgets (and you will), you’ll want to download new ones. You can find hundreds of free widgets on the Internet, most of which have been developed by thoughtful individuals around the world. One of the best places to download widgets is directly from Apple. You know these widgets are safe – not just anyone can get their widget up on Apple’s website! There are some really interesting widgets there, and if you feel your dashboard is lacking in widgets, you should take a look and download a couple.
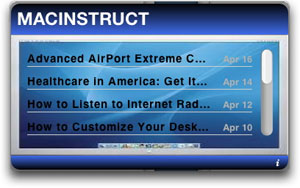
After you download a widget, you’ll need to install it. Here’s how:
Double-click the .wdgt widget file. (This probably downloaded to your desktop.) A message will appear asking you if you really want to install the widget. Click Yes.
Dashboard will open with the new widget in the middle of the screen. If you like the widget, click Keep. If you don’t like it, click Delete. (Note, however, that this doesn’t really delete the widget. We’ll show you how to delete widgets later.)
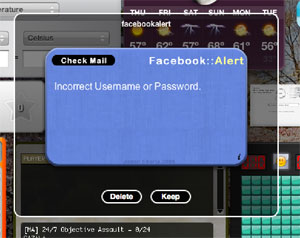
If you keep the widget, drag it wherever you want on your Dashboard. This is permanent – you can always move it later.
Dashboard in Slow Motion
So you installed some new widgets. Cool, but what’s next? Ah, yes… The good old slow-motion trick. This one will really knock the socks off all your Windows-using friends. This trick only requires one step and is really simple. You simply hold down the shift key while pressing the dashboard keyboard shortcut!
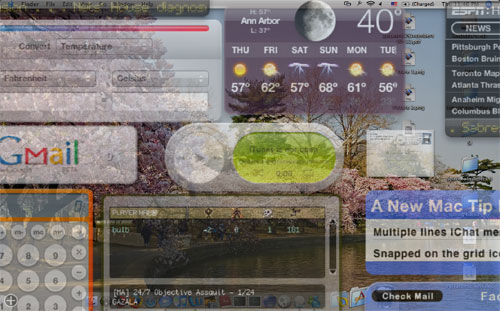
A screenshot of Dashboard fading in, in real time, is practically impossible to take, but we managed to get the shot below in slow motion. Here’s another secret: The slow-motion shift key trick can actually be applied to just about anything in Mac OS X that involves animation. (For example, minimizing a window, Exposé, etc.)
Unfreeze Frozen Widgets
If you’ve been using Dashboard long enough, you’ve had one of your widgets freeze or start acting funky. Those of you who haven’t had this happen are lucky! How do you fix a frozen widget? You could restart your Mac, or log out and back in just to fix that one widget, but that’s really friggin’ annoying. This little tip takes only a couple seconds – it’ll save you a lot of time!
Here’s how to do it:
Click on the widget. This only works when you’ve selected the widget, so you must select the widget by clicking on it. Some widgets (like calculator) have a visible change when you’ve selected them, but others don’t, so click on the widget you want to re-launch just to be safe.
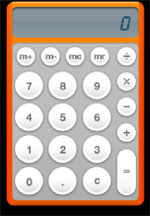
You can tell the Calculator widget isn’t selected here, because the display is grey.
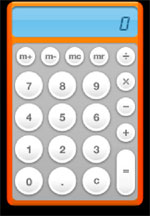
Okay, now the Calculator widget is selected. We can tell, because the display is blue.
Press Command (the Apple key) and the R key. The widget will swirl (cool animation!), and then it will reload. It’s that simple! Just hit Command-R.
Relaunching Dashboard
Dashboard isn’t like most Mac applications – there isn’t an easy way to quit it. In fact, you can’t even force-quit it from the Force Quit menu! Nevertheless, there are two ways to relaunch Dashboard. Here’s the easy way, complete with a graphical user interface:
Open the Activity Monitor. You can find it in Applications > Utilities.
Select Dock in the list of processes.
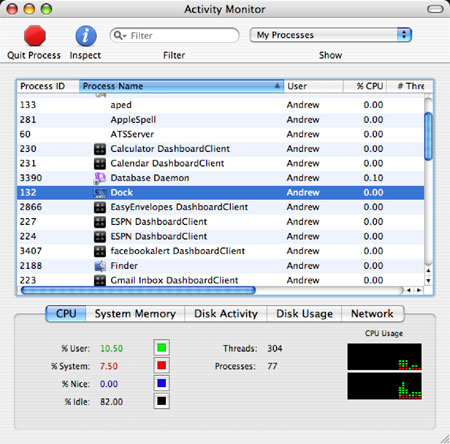
Click Quit Process.
Click Force Quit.

Your dock will disappear and re-appear. When you open Dashboard again, all of your widgets will reload, just like when you just log in.
Use can also use the Terminal to relaunch Dashboard. Here’s how:
Open the Terminal. You can find it in Applications > Utilities.
Type
killall Dock. Hit Return.
Your dock will disappear and re-appear. When you open Dashboard again, all of your widgets will reload, just like when you log in.
Uninstalling Widgets
If you’re like us, you have, over a period of months, installed so many widgets that you don’t remember what half of them do! Periodically, we go through our widgets and uninstall the ones we don’t use. Oddly enough, it isn’t completely obvious how to do this, so we figured a small explanation was in order. There are two ways to do this. One method involves the use of Dashboard itself, and the other requires manual file manipulation. Here’s how to use the Finder to uninstall widgets:
- Open a Finder window.
- Navigate to your home directory (Users > yourusername). Open your Library folder.
- Open your Widgets folder.
- Find the .wdgt file of the widget you want to uninstall. Drag it to the trash.
- Relaunch Dashboard.
Here’s how to use Dashboard to uninstall widgets:
Open Dashboard.
Click the small plus sign in the bottom left corner.
Click Manage Widgets.
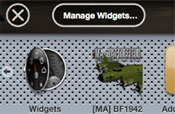
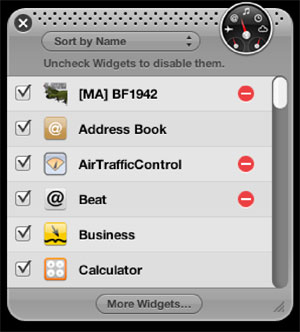
A new window will open. Widgets that can be uninstalled have a red sign next to them. You just have to click on this red button to uninstall the widget.
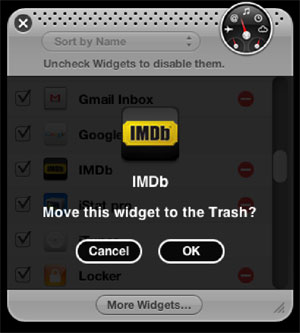
Click OK to delete the widget.
If you have multiple widgets to uninstall, it might be easier to use the first method, but if you don’t feel comfortable digging around in semi-important files, just use Dashboard.
Delve into Dashboard’s Developer Mode
Is there one widget you’re constantly checking? Do you wish you could put it on your desktop? Well wish no more – you can! While this trick involves diving into the depths of the Terminal, it’s completely legitimate and built in to Mac OS 10.4. There’s absolutely no hacking involved! Here’s how to turn on Dashboard’s developer mode:
Open the Terminal. You can find it in Applications > Utilities.
Type
defaults write com.apple.dashboard devmode YES. You have just told Terminal to change the devmode value to yes in Dashboard’s preference file.Relaunch Dashboard.

Now developer mode is enabled, but how do you use it? Open Dashboard and find the widget you want to keep open on your desktop. Click and hold the widget, like you’re going to drag it.
Press the Dashboard keyboard shortcut while still holding down the mouse button.
Since developer mode is enabled, the widget comes with you. You can now let go of the mouse button and let the widget settle into its new home. You’re done!
Okay, so now the widget is floating on your desktop, and it’s really starting to piss you off. Good thing you can put it back on your Dashboard just as easily as you took it off! Here’s how:
- Click and hold the widget.
- Press the Dashboard keyboard shortcut to open Dashboard.
- Let go of the mouse button. The widget is now back on your Dashboard.
Press the Dashboard keyboard shortcut again and notice how the widget doesn’t follow you. If you feel it absolutely necessary (or you just feel like it), you can turn developer mode off just as easily as you turned it on. Here’s how:
- Launch Terminal.
- Type
defaults write com.apple.dashboard devmode NO. - Hit Return.
- Relaunch Dashboard.
Developer mode will turn off!
Dashboard’s Future
It looks like Apple will incorporate Dashboard more fully into iLife with the release of Leopard and the release of Dashcode, Apple’s software for simple widget writing (http://developer.apple.com/tools/dashcode/). They have a beta version available for download. Dashboard has potential to become even more fully integrated into Mac OS X – a potential that has not been fully tapped as of this writing. Even Microsoft has seen the light, putting “widget like things” (sort of, maybe) into Windows Vista. Since Mac OS X clearly has a better implementation, why not make full use of it?
Subscribe to our email newsletter
Sign up and get Macinstruct's tutorials delivered to your inbox. No spam, promise!