How to Update Your iPad's Software
Matt Cone May 9, 2012 Tutorials iPad
This week Apple released iOS 5.1.1, the newest version of the operating system for iPads, iPhones, and iPod Touch devices. You used to have to connect to a computer with iTunes to install updates, but not anymore. With the “over-the-air” update feature built into iOS, you can use your iPad to download and install the iOS updates while connected to a wireless network. This guide will show you how to update your iPad’s iOS software wirelessly using the over-the-air update feature.
How to Install iOS Updates Wirelessly
Installing an iOS update on your iPad takes only a couple of minutes with the over-the-air update feature. Here’s how to do it:
Connect your iPad to a wireless (Wi-Fi) network, if it’s not already connected to one. iOS updates cannot be downloaded over 3G.
From the iPad’s home screen, tap Settings.
Tap General on the sidebar. The screen shown below appears.
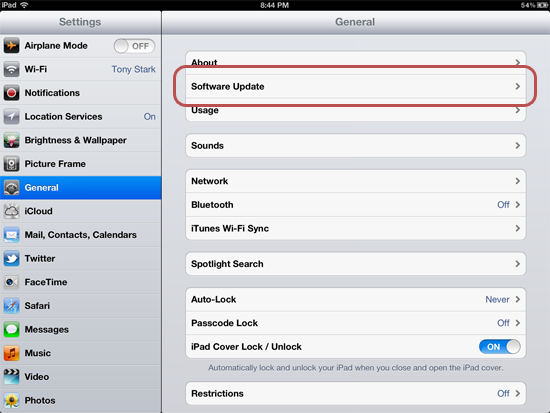
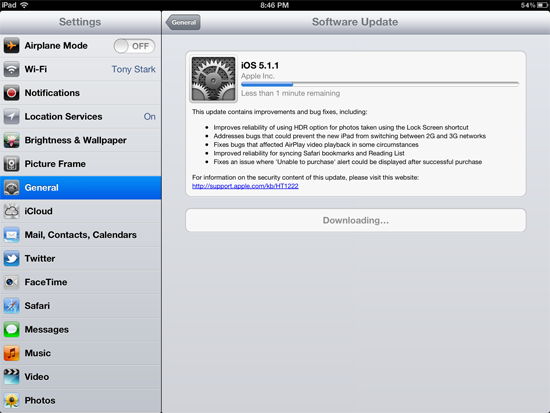
Tap Software Update. The screen shown below appears.
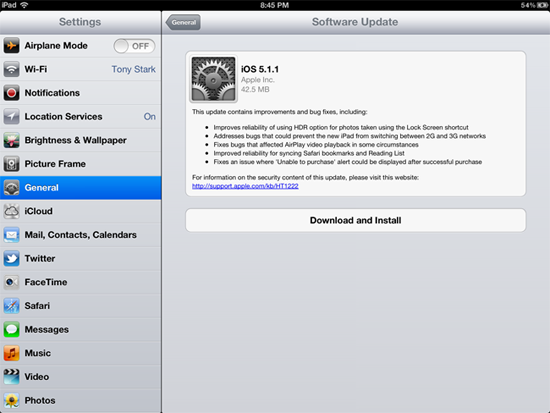
If there’s an iOS update available, it will appear here. To download and install the update, tap Download and Install. The screen shown below appears.
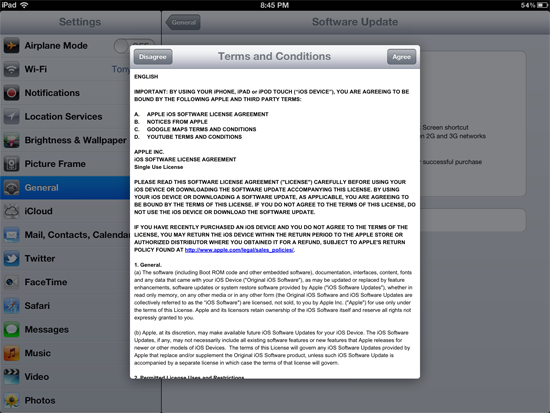
Tap Agree to accept the terms and conditions. The screen shown below appears.
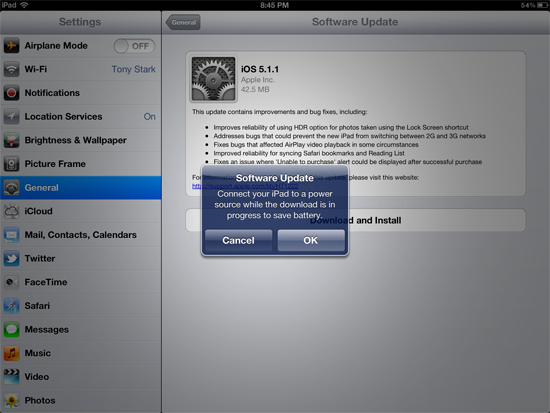
This alert recommends that you connect your iPad to a power source, which is a good idea. You don’t want your device to run out power while the update is being installed. Tap OK. The screen shown below appears.
The update downloads to your iPad. Once it completes, the iPad will automatically restart and install the software update. Do not restart or turn your iPad off during this process. You’ll know the installation has completed when the iPad’s lock screen appears.
How to Install iOS Updates via iTunes
Still want to use iTunes to install iOS updates on your iPad? You can do that, too. Here’s how:
Connect your iPad to your Mac with the USB cable.
Open the iTunes application on your Mac.
From the sidebar, select the iPad. The window shown below appears.
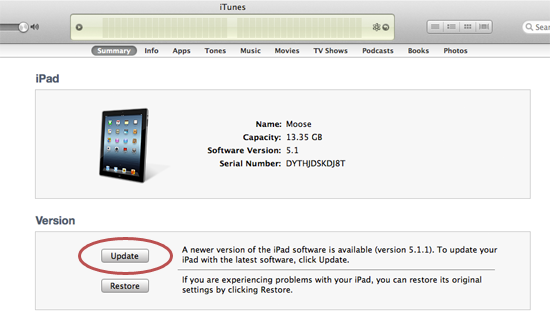
Click Update.
Follow the on-screen instructions to update your iPad to the newest version of iOS.
Verify that iOS Updates were Installed
Now that you’ve installed the software updates on your iPad, you should verify that the updates were actually installed and check for new software updates. Here’s how:
From the iPad’s home screen, tap Settings.
Tap General on the sidebar.
Tap Software Update. The screen shown below appears.
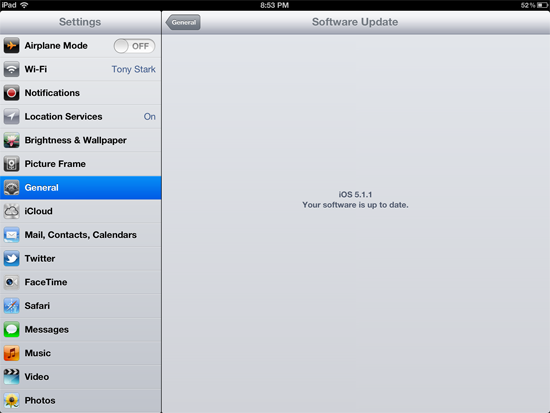
The iPad indicates that iOS is up to date. Keep checking back for new updates!
Related Articles
Subscribe to our email newsletter
Sign up and get Macinstruct's tutorials delivered to your inbox. No spam, promise!