Make an Encrypted Disk Image to Secure Files
David Miller March 16, 2007 Tutorials Mac Security
Encryption satisfies one of the most basic, fundamental human needs: The right to privacy. By using encryption, you can be reasonably confident that your files will be protected from prying eyes. This is especially important if you work on computers that are shared with others, or if you frequent high-traffic computing environments, such as computer labs.
Fortunately, the ability to encrypt files using disk images is a free feature built into every Mac running Mac OS 10.2 or later. You can encrypt and save many of your secret files into one file that is password-protected, and you can even burn these files onto CDs to securely transport your top-secret information to another Mac. We’ll show you how.
What is an Encrypted Disk Image?
An encrypted disk image is a file that is 128-bit encrypted. When you double-click on this file, Mac OS X will prompt you for a password. Once authenticated, the disk image will mount on your Mac as if you had inserted a CD or USB flash drive. Once you have copied data to the mounted disk image, you can unmount the image and secure it. Anyone wanting to open your disk image will have to type your password to view its contents.
How to Create an Encrypted Disk Image
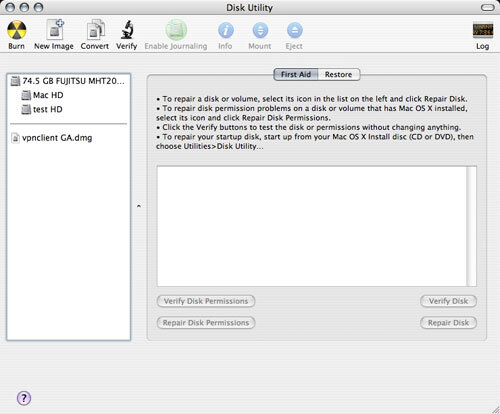
Launch the Disk Utility application. You can find this in Applications > Utilities.
From the File menu, select New Blank Image. Or, you can click the New Image icon on the toolbar.
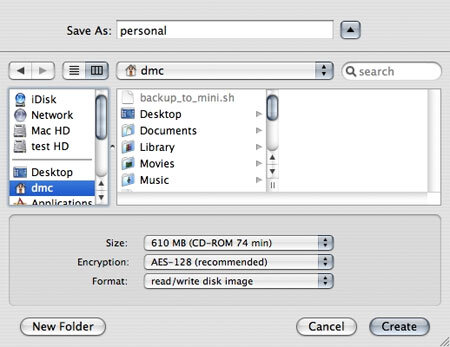
Select the size you’d like the encrypted disk image to be. There are many options, but we recommend using the 610MB (CD-ROM 74 min) option. This will provide plenty of room, and the image will fit perfectly on a CD if you want to back up your data.
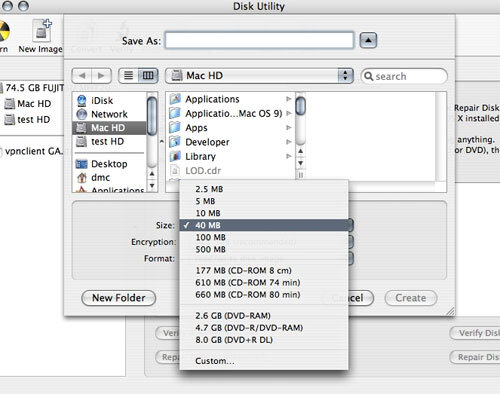
Make sure you select the AES-128 (recommended) option under the encryption menu. Name your image and click Create to save it.
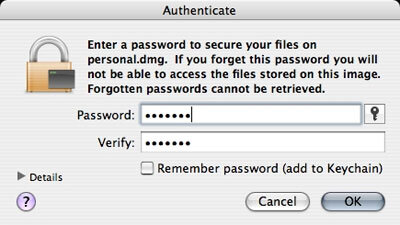
Once you save your image, the Disk Utility application will prompt you for a password. Make sure you uncheck Remember password (add to Keychain). If you don’t uncheck this box, it defeats the purpose of the encrypted disk image. Anybody could walk up to your Mac and mount the image!
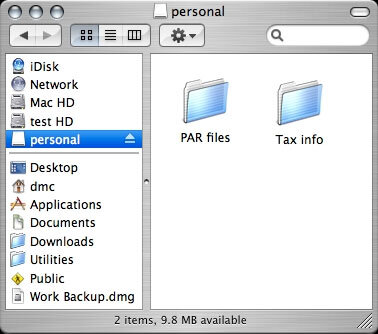
After the image is created, it will automatically mount for the first time. You can now copy files to the image. When you are finished, make sure you unmount the image by dragging its icon to the trash or selecting the eject button next to its icon in any finder window.
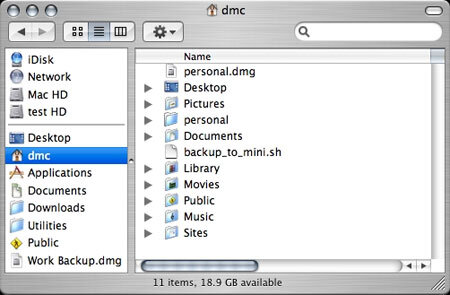
To mount the image again, simply double-click on the disk image you created. In the image below, our disk image is called personal.dmg. You’ll see it at the top of the list.
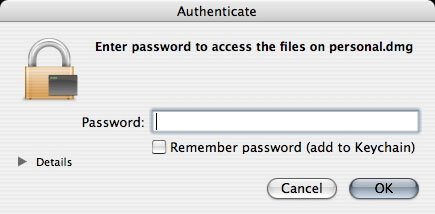
Enter your password when prompted. Click OK. Your disk image should be mounted!


Remember to unmount your disk image when you are finished with it.
How to Burn Your Disk Image to CD
Encrypting your information is great, but there may come a time when you want to take it with you. To do that, you’ll have to burn your disk image to a CD. There are two ways of doing this:
- Burn the encrypted disk image to a CD to preserve the privacy of the data.
- Burn the contents of the disk image and remove any privacy.
To burn the disk image and preserve the privacy of your data, simply drag the image file to a writable CD icon in the Finder. Don’t drag the mounted version - just the .dmg file. To burn the contents to a CD without privacy, use the Disk Utility application. Select the image from the left-hand menu and click the burn icon in the toolbar. (It looks like a radiation symbol.)
