12 Step Program for Recovering Windows Users
Arbi Karamians July 31, 2007 Tutorials Mac
There was once a time in my life when I’d wake up in the morning with bloodshot eyes, a headache and a sore back. This was not, unfortunately, due to my endless partying with co-eds, rather it was the result of my endless battle with my Windows PC. Whether it was trying to get my printer to work, or trying to track down a driver, or even contemplating whether I should throw my PC out the window because I’d received the “blue screen of death” - the problems just never seemed to stop! Those days, however, are a distant memory, because I now own a shiny MacBook Pro.
My transition from Windows to Mac OS X was easy since I had a pal who had been a Mac-user his entire life. He fed me tips and tidbits that really helped me throughout the early stages of my “macification.” Unfortunately, some of you might not be as lucky as I was. We’ve put together a 12-step PC to Mac resource for recovering Windows users. We’ll incorporate my experience with Apple’s own Switch 101 to get you through your life changing transition. We’ve also attached a cheat sheet Apple made available so new users can write down and have access to all their important Apple information.
So here we go!
1. I Need My Personal Files, But They’re On My PC
Don’t worry – it’s all pretty straightforward. If you’ve recently purchased a Mac, you can ask your local Apple Store Genius Bar to transfer all your data from your PC to Mac for free. Yes, you heard correctly - they’ll do it for free. That helpful service comes as part of your standard Apple Care service. Don’t live near an Apple Store? Don’t worry! There are several ways you can transfer the years of data you’ve managed to stuff into your PC:
- CD-R/DVD-R: You can burn the data to a CD-R/DVD-R. Each CD-R can easily accommodate a 750 MB transfer and a DVD-R 4.7 GB transfer. We used this process, because we only needed to transfer 3 GB of personal information.
- Portable Hard-Drive: Transferring your files to an external hard-drive and on to your Mac is also a great option. If you don’t have an external hard-drive, we suggest purchasing one – backing up is essential when using either a PC or Mac. You can easily find 30GB to 40GB external hard-drives for around $50, which is a pretty reasonable for a sound investment.
- Direct Ethernet or Wireless Connection: A simple Ethernet crossover cable can do the trick. You connect the two computers together using the Ethernet crossover and start transferring files. Or, you can connect your computers together wirelessly. Either option works!
For more ways to transfer data, visit this Apple Support page on this issue.
2. Where’s My Computer? I Need to Access My C: Drive!
Macs don’t have a “My Computer,” and they don’t have a “C: drive." They do, however, have your local hard drive readily accessible on your desktop.
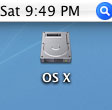
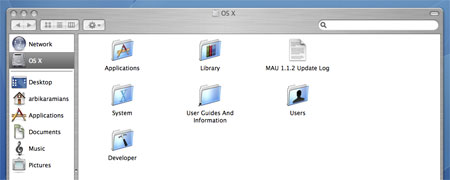
This hard drive works much the same way as your PC’s “My Computer." In our opinion, the Mac’s hard drive is quite a bit more organized. As you can see, it has all your important folders in a column on the left-side of the window. That way, whether you’re searching for a Word document, an MP3 file, or a photo from your winter trip to Bali with the wife and kids, they’re all within reach.
3. I Want to Install an Application, But I Don’t Know How
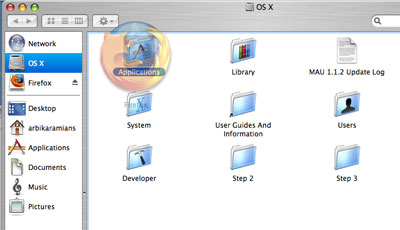
The process of installing an application in Mac OS X is pretty straightforward. Unless otherwise prompted by the installer itself, simply drag the application from its source folder to the applications folder under your local hard drive.
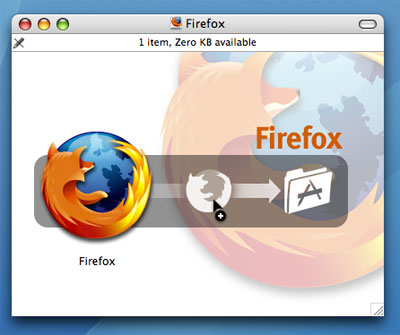
Once you do this, a status window will appear to show you the percentage and time left until the transfer (installation) is complete. Some installers are more conventional in the sense that they install via a step-by-step process, much like they would on a PC.
4. I Need to Run an Application, But I Can’t Find the Start Menu
To make it simple to track down frequently used programs, Apple created the Dock. The Dock is stationed on the left, bottom, or right of your screen, and the placement is entirely your choice. You can also choose to have the dock automatically hide itself and only appear when you mouse over it.

The Dock is also where your trash can, minimized open windows, and programs will be placed when they’re inactive. Essentially, the dock replaces certain aspects of a PC’s desktop and status bar. You can add and remove programs to the Dock by dragging them into the Dock from your applications folder and just as easily remove them from your Dock by dragging them out.
5. I Looked in Documents, Applications… and I Still Can’t Find It
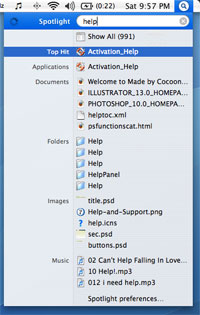
If you’ve looked through your different folders and are having trouble finding something, look no further than Spotlight. Simply run a quick live search for your item and search everything on your computer including documents, images, and even emails. When Spotlight finds an item which fits your search query, it will organize the search by showing you each item which fits your query and show you the folder in which it’s located.
6. A Program Froze and Ctrl-Alt-Del Doesn’t Work
Applications rarely freeze on Macs, but it will happen to you at some point. When this happened on your PC, you hit Ctrl + Alt + Del and you got a list of every single process your computer was running at the time. You ran down your list of fifty different processes until you came across your ill-functioning program and quit it.
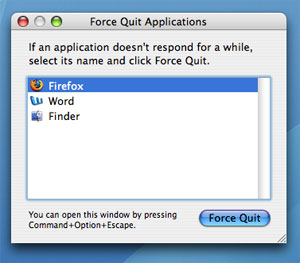
On your Mac, the process is quite similar with only one slight difference - instead of hitting Ctrl + Alt + Del, you hit ⌘ (apple/CMD) + Option (alt) + Esc. A list of running programs will appear. You don’t have to run through a list services that you’re not looking for – only your running programs appear so you can easily locate the program you’re looking to quit.
7. Does This Thing Have a Right Click?
Yes, you can right click with your Mac. In fact, if you run out and grab the newest release of Apple’s “Mighty Mouse,” you have the option in Mouse/Keyboard settings to set a secondary button (right click). If you don’t want to spend the cash on a new mouse, just use Ctrl + Click - it’s the equivalent to a right click. If you’re on a laptop, simply place two fingers on the track pad and click. This is nifty because it eliminates the need to Ctrl + Click.
8. I Can’t View Videos I Transferred From My PC
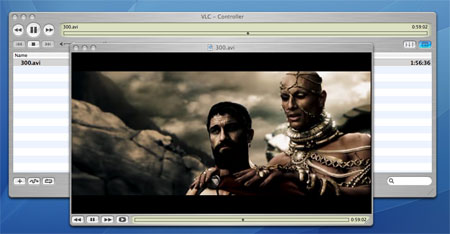
This is a pretty common issue. There are several solutions to this problem, but you’ll only need two. Our first suggestion is the VLC VideoLan Media player. We have never come across a video VLC couldn’t play. It is known to be one of the most platform independent players on the web. Best of all, it’s completely free!
Your other option is to use Flip4Mac, a free application that allows you to watch Windows Media Player files.
9. I Need to Install My Old PC Printer and Mouse
You need not be concerned about installing your PC accessories. Stop searching for your driver CDs and searching the Internet for the company website to download software – connect the device to your Mac. Chances are it will work! There is an enormous number of devices that Macs are pre-bundled to support. In fact, they’ve added the list on their support page. Check it out!
10. I Need to Move My Outlook Email Messages to My Mac
Moving your email messages from your PC to your Mac is a simple process. Entourage is Microsoft’s Email application for Macs. Apple’s Genius Bar is also a great place to resolve this issue. When taking your computer in to have them transfer your data, you can request that they transfer your Outlook messages as well. If, however, you are nowhere near an Apple Store, then follow these easy directions. The easiest way of going about this is to download Mozilla Thunderbird, and then select Import Messages from Outlook from the File menu and open the file in Thunderbird. (Apple’s Mail application also has a similar option.) Since Thunderbird uses the .mbox format, you can easily transfer your files!
11. Windows Used to Update Itself. What about Mac OS X?
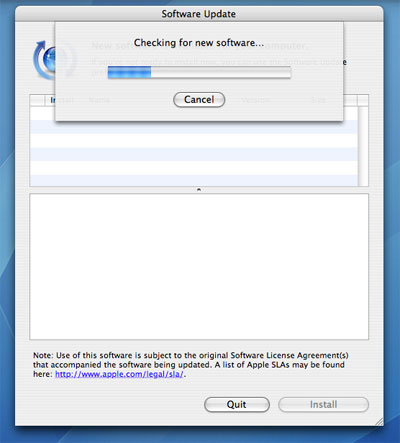
We’ll venture to say that Mac OS X’s update feature is far more convenient and easy to use than its Windows counterpart. Simply click on the Apple menu in the upper left-hand corner of your screen, select Software Update, and OS X will automatically begin searching for updates. If your OS is up to date, you’re informed of just that. If you need updates, simply click the Install button and wait. With a broadband connection even the largest updates only take 10-15 minutes.
12. How Do I Access the Mac OS X Device Manager?
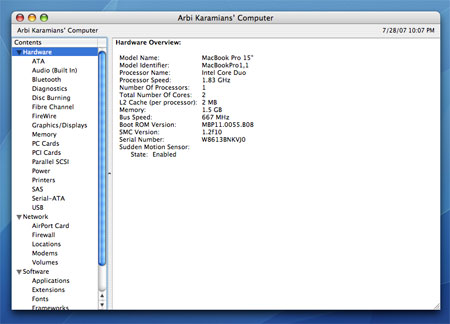
Mac OS X does not have a Device Manager like Windows. In Windows, you navigate your way to Device Manager from My Computer > Properties > Device Manager tab. In Mac OS X, if you’re searching for information regarding a certain device, you simply click on the Apple menu and select About This Mac. If you’re looking for a more detailed list of devices click the More Info button.
These twelve steps should help to alleviate some of the frustration you may encounter while switching to Mac OS X. It’s important to understand that although it is a change, it’s neither a difficult change nor a change for the worse. In no time you’ll find yourself being happier and more productive. And with the money you save on Aspirin, you can buy yourself other shiny Apple products. Welcome to the family!
Subscribe to our email newsletter
Sign up and get Macinstruct's tutorials delivered to your inbox. No spam, promise!