How to Run Windows on Your Mac with VMware Fusion
Matt Cone January 22, 2008 Tutorials Mac Apps
It’s an exciting time to be a Mac user. Everyone knows that we get to use Mac OS X Leopard, the world’s most advanced operating system. And now, if you have an Intel-based Mac and an application called VMware Fusion, you also have the option of using the world’s second and third and fourth best operating systems! Yes, we’re talking about Microsoft Windows, the operating system that the rest of the world has the misfortune privilege of using.
Why would someone want to go and do something like install Windows on their Mac? Good question. We’re guessing that they’ll probably want to use some applications that are unavailable for Mac OS X, like… Internet Explorer? Who knows. Anyway, if you’d like to do the unthinkable and install one of the other operating systems, then follow along.
What is Virtualization, and how does it work?
Before we start, we want to tell you a little about how VMware Fusion works its magic. Here are the main points you need to understand VMware:
- VMware Fusion is a normal application that you install on your Mac. You can use it after you’ve booted into Mac OS X. It resides in your Applications folder and it sits on your Dock, just like Safari and iTunes.
- After you install VMware Fusion and start the application for the first time, you’ll create what’s called a virtual machine. This is actually a file that lives on your Mac, but to casual users it appears to be an actual computer running within Mac OS X. For example, you can see Windows boot up on the virtual machine.
- VMware Fusion will help you install whichever operating system you’d like to use on your virtual machine. Microsoft Windows XP and Vista are just two of many operating systems you can install. You could also install a Linux-based operating system, for example.
- Once you’ve installed your operating system, you can boot into your virtual machine after you’ve started your Mac. In fact, you can even switch out of your virtual machine and back into Mac OS X at any time. The two operating systems are running in parallel, so you’ll never have to restart your Mac to get from Mac OS X to Windows, or vice versa.
As Wikipedia states: “Virtualization is a technique for hiding the physical characteristics of computing resources from the way in which other systems, applications, or end users interact with those resources. This includes making a single physical resource (such as a server, an operating system, an application, or storage device) appear to function as multiple logical resources.”
Virtualization is a popular option for those with high-power computers. In the past, when computers were relatively slow, computer hobbyists would use a technique called Beowulf clustering to connect several computers together to create one supercomputer. Today, with powerful computers such as the Mac Pro, the trend has been away from Beowulf clusters and towards virtualization options such as VMware. (Today’s Mac Pros are so powerful that most individuals have trouble enough utilizing a single Mac Pro’s resources!) Virtualization essentially allows individuals to turn one computer into multiple computers. This technique is particularly useful in IT departments, where many servers can be virtually combined onto one single physical computer.
In this tutorial, we’ll simply show you how to install Windows on your Mac. However, VMware has many other powerful uses with which you can experiment. Don’t stop with installing Windows!
Gamers Can Forget Virtualization
We know that some will be tempted to use VMware to play Windows-based games. Is such a thing possible? VMware’s website states that “VMware Fusion has experimental 3D graphics support allowing you to play select DirectX 9.0 games in Windows XP Service Pack 2 virtual machines.”
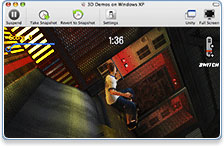
It all sounds great, until you actually try to install and play a game with VMware. Your mileage may vary. Our graphics look weird and our mouse doesn’t respond. Sure it’s a bummer, but you can still use Apple’s Boot Camp to install Windows and play games. Unfortunately, installing Boot Camp is another tutorial entirely.
Why Pick VMware Over Parallels?
If you know anything at all about virtualization on the Mac, you may be wondering why we choose VMware Fusion over Parallels, another application that allows you to run Windows on your Mac. The two products appear nearly identical, at least at first glance.
We selected VMware Fusion, because at this time we feel that it’s a more polished application. Fusion provides more features, and VMware provides better support than the competition. And then there’s the experience factor. The guys over at VMware have been in business for years, and they really know their virtualization stuff.
Having said that, you might want to give Parallels a try. The installation process is similar to VMware Fusion, as is the price.
How to Run Windows with VMware Fusion
Before you start, make sure you have some time to allocate to this procedure. It could take you an hour or so to install Windows and set everything up. Here we go!
Download and install VMware Fusion. If you have purchased a copy of VMware Fusion, enter the license code during the installation process. If you don’t have a license code, just continue with the installation – you can always purchase VMware Fusion and enter the license code later.
Start the VMware Fusion application by double-clicking its icon in the Applications folder. You should see the window shown below.
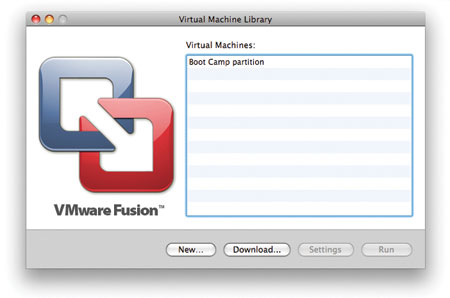
Click New to start the New Virtual Machine Assistant.
The New Virtual Machine Assistant will appear. Click Continue to start the process.
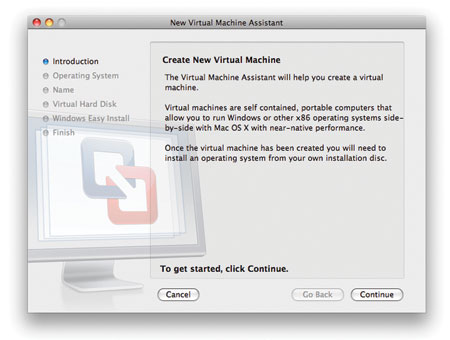
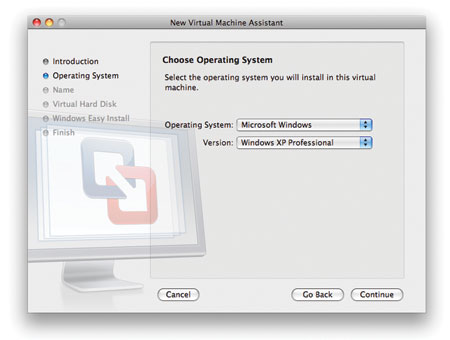
Select the operating system you’re planning to install. For the purposes of this tutorial, we’ll be installing Microsoft Windows XP Professional.
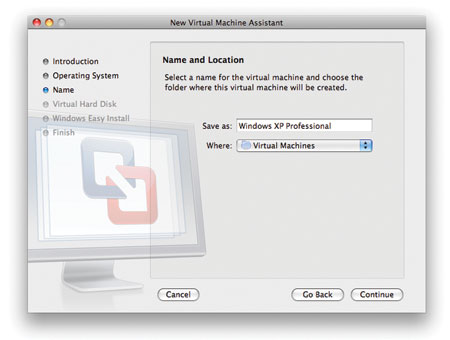
Enter a name for your virtual machine, and select the folder where you’d like to store your virtual machine.
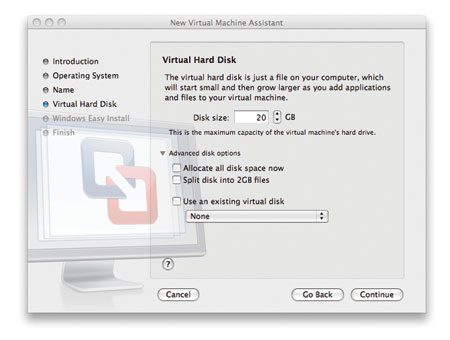
Configure the settings for your Windows hard drive. Remember that this Windows hard drive is actually a file on your Mac’s hard drive, so this space could potentially be subtracted from the available space in Mac OS X. VMware Fusion will only allocate as much space as is required by Windows, so the number you specify is the maximum amount of space that Windows can use. Space cannot be reclaimed. If you install an application in Windows and then remove it, the virtual machine file does not shrink.
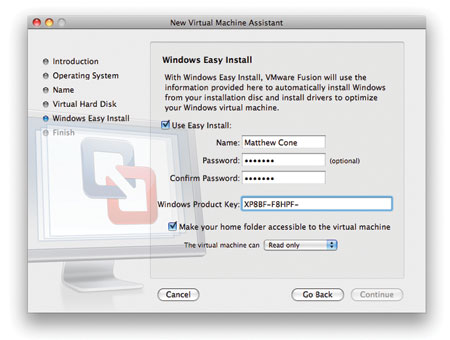
If you’re installing Windows on this virtual machine, you’ll probably want to use VMware Fusion’s “Windows Easy Install” feature. It takes care of most of the installation headaches associated with Microsoft Windows. Just enter your name, a password, and your Windows Product Key.
You can also select the “Make your hard drive accessible to the virtual machine” option to access your Mac’s files. This feature is a bit buggy, and think twice before enabling read and write permissions. If your virtual machine gets a virus, it could wreck havoc on your Mac!
Insert the Windows installation CD in your computer’s disc drive, and then click Finish to start the installation process.
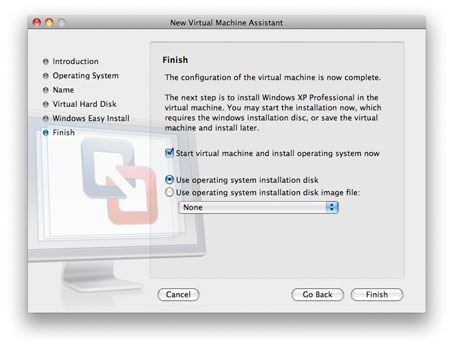
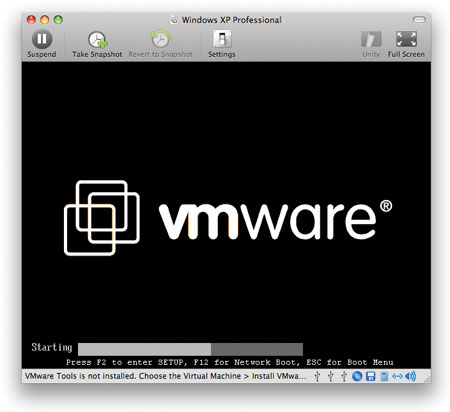
Your virtual machine will start. Notice how PC-like it looks!
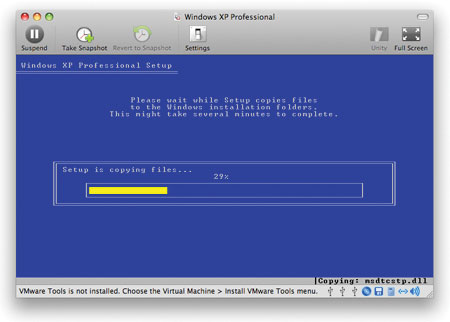
If all goes well, your virtual machine will startup from the Windows installation CD and start installing Windows. You’ll see a blue screen with lots of files flying by. (No, this is not what’s known as the blue screen of death, although some may call it that.)
After installing critical files, the virtual machine will restart and… install some more files. It should be apparent that the Windows XP installation process is nothing like the Mac OS X installation process. Be patient!
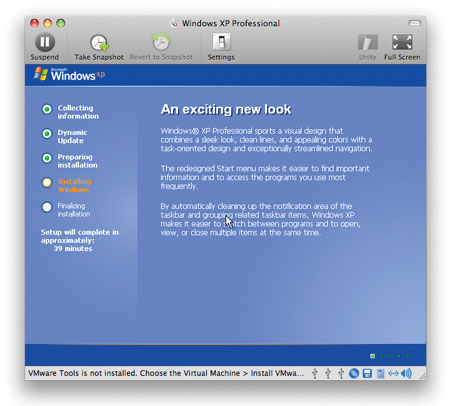
After this main installation process completes, you’ll restart into Windows for the first time. Windows will take some time to configure itself.
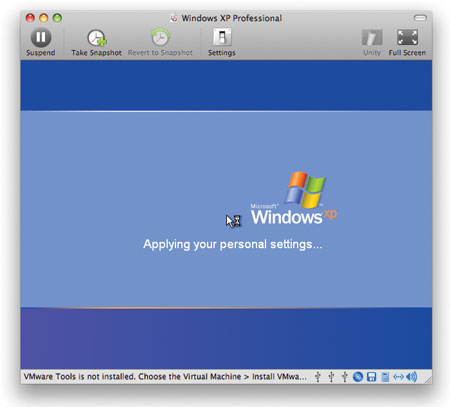
After Windows configures itself, VMware Fusion will install VMware Tools – a very important set of utilities that allows Windows to communicate with your Mac’s devices and VMware Fusion itself.
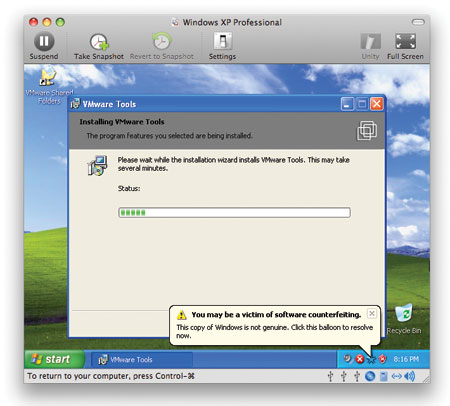
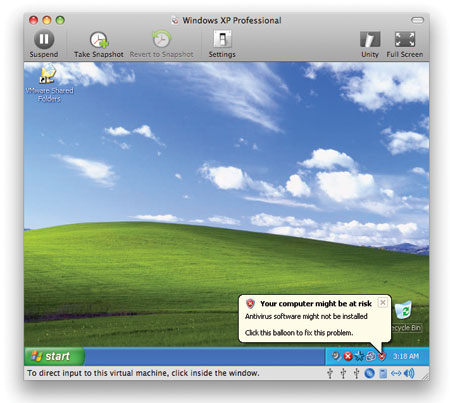
Windows will require another restart. After your virtual machine reboots, you should finally be able to use Windows.
Use Unity to Bring Windows Apps to Your Mac’s Desktop
Now that we have Windows installed on our virtual machine, we can start having fun. VMware Fusion has a great feature called Unity that allows you to run Windows applications right on your Mac’s Desktop. Here’s how to do it:
In Windows, launch an application.
On the VMware Fusion window, click the Unity button.
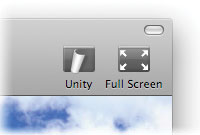
The VMware Fusion window will disappear, and all of the open applications in Windows will now appear to be Mac applications. They will appear on your Mac’s Desktop and on your Mac’s dock.
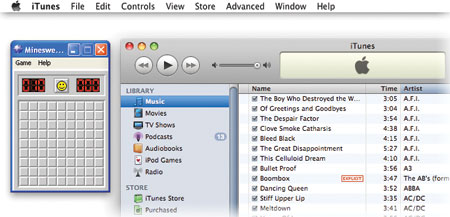
To exit Unity mode, click the VMware application icon, and then select Single Window from the View menu.
Configure Your Virtual Machine’s Settings
VMware Fusion does an excellence job of configuring your virtual machine’s settings, but those who need more performance will want to tweak the default settings a bit. Here’s how to do it:
If your virtual machine is turned on (and running Windows), turn it off. You can do this by selecting Shutdown from the Start menu in Windows.
Click the Settings button at the top of the VMware window.
There are plenty of options here to configure! Of course, most of the settings are beyond the scope of this tutorial. We’ll be focusing on the two panes that most people will probably want to mess with: Display and Memory. Select Display from the left-hand sidebar.
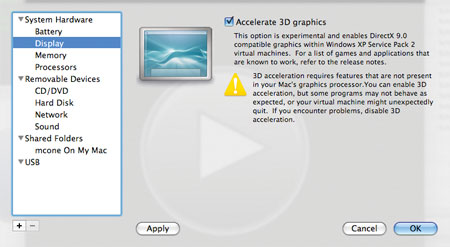
Select the “Accelerate 3D Graphics” option to enable DirectX and other Windows graphical elements. This will help you to play games and see those fancy Windows effects in Vista.
Select Memory from the left-hand sidebar.
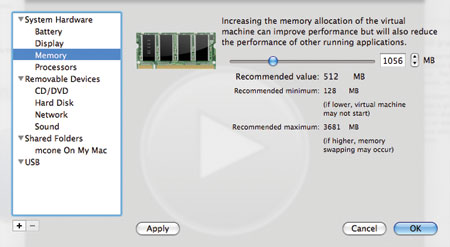
Up the memory as much as you like. However, the more memory you allocate to Windows, the less memory you’ll have to run applications in Mac OS X. And remember that if you’re using a 32-bit version of Windows, you won’t be able to allocate more than 3GB of RAM. See this article for more information.
Related Articles
Subscribe to our email newsletter
Sign up and get Macinstruct's tutorials delivered to your inbox. No spam, promise!